How to add in-app purchase to your Android application Android 09.04.2018

Monetization is one of the most important aspects of distributing your product to the rest of the world.
Android, being so widespread, provides ways for users to purchase products from within your app: this is referred to as In-app Billing. Through this set of APIs, developers can offer two types of products:
- Managed in-app products. As the name suggests, these products are managed by the developer, and they branch into consumable and non-consumable. A consumable product is usually temporary and, once consumed, can be bought again, whereas a non-consumable product is a one-off benefit that the user will continue having in your app.
- Subscriptions. These products come with a validity period (days, months, weeks, years) and are automatically renewed at the end of each billing cycle. When a subscription is not renewed, the product is no longer active for the user.
Your application accesses the In-app Billing service using an API that is exposed by the Google Play app that is installed on the device. The Google Play app then conveys billing requests and responses between your application and the Google Play server. In practice, your application never directly communicates with the Google Play server. Instead, your application sends billing requests to the Google Play app over interprocess communication (IPC) and receives responses from the Google Play app. Your application does not manage any network connections between itself and the Google Play server.
You must have a Google payments merchant account to use the In-app Billing service on Google Play.
The In-app Billing API provides the following features:
- Your app sends requests through a streamlined API that allows users to easily request product details from Google Play and order in-app products. The API quickly restores products based on the user's ownership.
- The API synchronously propagates order information to the device on purchase completion.
- All purchases are managed (that is, Google Play keeps track of the user's ownership of in-app products). The user can't own multiple copies of an in-app product; only one copy can be owned at any point in time.
- Purchased products can be consumed. When consumed, the product reverts to the unowned state and can be purchased again from Google Play.
- The API provides support for subscriptions.
In-app products are the digital products that you offer for sale to users from inside your application. Examples of digital products include in-game currency, application feature upgrades that enhance the user experience, and new content for your application. You can use In-app Billing to sell only digital content. You define your products using the Google Play Console.
The Play Console is where you can publish your In-app Billing application and manage the various in-app products that are available for purchase from your application. You can create a product list of digital products that are associated with your application, including products for one-time purchase and recurring subscriptions. You can define information for each product such as the following:
- Unique product ID (also called its SKU).
- Product type.
- Pricing.
- Description.
- Google Play handling and tracking of purchases for that product.
Google Play Purchase Flow. To initiate a purchase, your application sends a billing request for a specific in-app product. Google Play then handles all of the checkout details for the transaction, including requesting and validating the form of payment and processing the financial transaction.
When the checkout process is complete, Google Play sends your application the purchase details, such as the order number, the order date and time, and the price paid. At no point does your application have to handle any financial transactions; that role belongs to Google Play.
To simplify development with the In-app Billing API, you can use the Play Billing Library. This library is an in-app billing client developed as a wrapper on top of the Android Interface Definition Language file that interacts with the In-app Billing API. You can use the Play Billing Library to help you focus your development effort on app logic, such as listing products, displaying product details, or launching purchase flows. The Play Billing Library provides an easier to use alternative to developing with the Android Interface Definition Language file.
So, preparations steps are below
- Adding the Play Billing Library to your app
- Configuring the products in the Google Play Console
- Testing the in-app products in your app
Merchant account and in-app purchase products
To test your android app for in-app billing, you need to log into your Google Play Developer Console. If you have not registered with Google as an app publisher, then you will first of all do that.
To create a new Google Merchant Account, go the Settings menu option inside your Developer console page. Then select Account details and scroll down to the bottom of the page. Click on Create merchant account button. Follow the remaining instruction to finish up. Or you can manage your Merchant account at Google Payment Centre -> Settings.
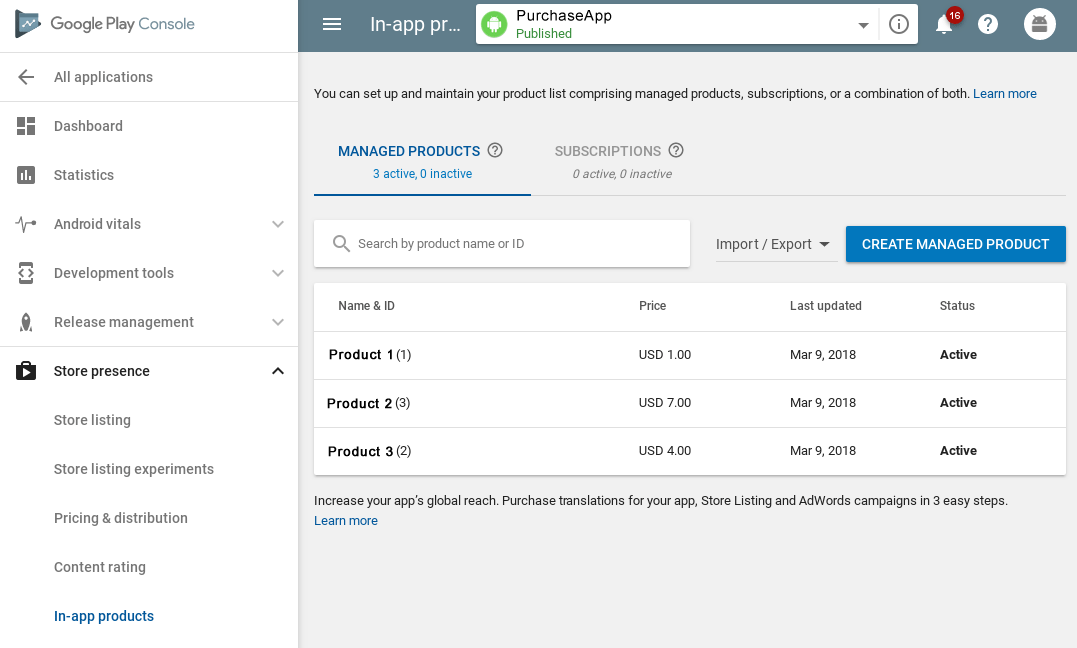
To add in-app purchase products go to the YOUR_APP > Store presence > In-app products menu. There are two type of in-app purchase products – Managed product and Subscription products. We will focus on the Managed Product. Click on Add new product button. Add the title and description for the product. Set a price for the product. When you are done, make sure you click on the Inactive button and activate this product.
I have add the following products as shown in the screen shot below.
Create android application
We are going to update the AndroidManifest.xml file by adding the following user permissions
<uses-permission android:name="com.android.vending.BILLING" />
<uses-permission android:name="android.permission.INTERNET" />
Next step is adding the aidl file to your project.
The IInAppBillingService.aidl is an Android Interface Definition Language (AIDL) file that defines the interface to the In-app Billing service. You can use this interface to make billing requests by invoking interprocess communication (IPC) method calls.
You can find the IInAppBillingService.aidl file in the Trivial Drive sample app. To add the In-app Billing library to your project, follow these instructions:
- In Android Studio, import the IInAppBillingService.aidl file to your project as described in the following steps:
- Create a directory named
aidlundersrc/main. To create the aidl directory, right-click on the app node in the project tool window, selecting the New -> Folder -> AIDL Folder menu option. Within the Project tool window theaidlfolder should now be listed. - Add a new package
com.android.vending.billingin this directory. Right-click on theaidlfolder and select the New -> Package menu item. In the resulting dialog, enter com.android.vending.billing into the text field and click on OK. - Import the
IInAppBillingService.aidlfile into this package.
- Create a directory named
- Build your application. You should see a generated file named
IInAppBillingService.javain thegen/directory of your project. - Add the helper classes from the
util/directory of the Trivial Drive sample to your project. Remember to change the package name declarations in those files accordingly so that your project compiles.
To get going with the Play Billing library you need to begin by adding the following dependency to your application-level build.gradle file:
compile 'com.android.billingclient:billing:1.0'
The Play Billing Library provides us with the functionality to consume any items which have previously purchased - this can be useful for tangible things such as power-ups in games or timed unlocking of features. This can be done by using the consumeAsync() method and as parameters, this method takes the purchase token (which would have been received when the item was purchased) and an instance of the ConsumeResponseListener class as a callback for the result of the consumption.
IABHelper is just a wrapper utility class, which intends to give you an example of how IInAppBillingService is to be used. IInAppBillingService is a part of in-app billing API. It is used to perform purchases and check statuses. You can use this service directly and forget about the helper class. Many people find IABHelper simpler and they use it as-is. Other people use service and ignore helper class completely.
Following is a example of in-app purchase activity with query and consume flow.
public class PurchaseActivity extends AppCompatActivity {
    Activity activity = PurchaseActivity.this;
    private String TAG = Constants.TAG;
    @BindView(R.id.rvItems) RecyclerView rvItems;
    @BindView(R.id.llLoader) LinearLayout llLoader;
    @BindView(R.id.llEmptyList) LinearLayout llEmptyList;
    @BindView(R.id.llNoInternet) LinearLayout llNoInternet;
    @BindView(R.id.btnContinue) Button btnContinue;
    LinearLayoutManager lm;
    ItemAdapter adapter;
    List<String> additionalSkuList = Arrays.asList("1", "2", "3");
    int RC_REQUEST = 10001;

    IabHelper mHelper;

    @Override
    protected void onCreate(Bundle savedInstanceState) {
        super.onCreate(savedInstanceState);
        setContentView(R.layout.activity_purchase);

        ButterKnife.bind(this);

        String base64EncodedPublicKey = "_BASE64_KEY_";

        mHelper = new IabHelper(this, base64EncodedPublicKey);

        mHelper.startSetup(new IabHelper.OnIabSetupFinishedListener() {
            public void onIabSetupFinished(IabResult result) {
                if (!result.isSuccess()) {
                    Toast.makeText(activity, "Problem setting up In-app Billing: " + result, Toast.LENGTH_SHORT).show();
                } else {
                    loadProducts();
                }
            }
        });
    }

    private void loadProducts() {
        try {
            mHelper.queryInventoryAsync(true, additionalSkuList, null, new IabHelper.QueryInventoryFinishedListener() {
                @Override
                public void onQueryInventoryFinished(IabResult result, Inventory inv) {
                    List<PurchaseItem> items = new ArrayList<>();
                    PurchaseItem item;

                    for (String s : additionalSkuList) {
                        item = new PurchaseItem();
                        item.setTitle(inv.getSkuDetails(s).getTitle());
                        item.setDescription(inv.getSkuDetails(s).getDescription());
                        item.setPrice(inv.getSkuDetails(s).getPrice());
                        item.setId(inv.getSkuDetails(s).getSku());
                        items.add(item);
                    }

                    llLoader.setVisibility(View.GONE);

                    if (items.isEmpty()) {
                        rvItems.setVisibility(View.GONE);
                        llEmptyList.setVisibility(View.VISIBLE);
                    } else {
                        llEmptyList.setVisibility(View.GONE);
                        rvItems.setVisibility(View.VISIBLE);

                        lm = new LinearLayoutManager(activity, LinearLayoutManager.VERTICAL, false);
                        rvItems.setLayoutManager(lm);

                        adapter = new ItemAdapter(activity, items);
                        rvItems.setAdapter(adapter);
                    }
                }
            });
        } catch (IabHelper.IabAsyncInProgressException e) {
            e.printStackTrace();
        }
    }

    @Override
    public void onDestroy() {
        super.onDestroy();
        if (mHelper != null) try {
            mHelper.dispose();
        } catch (IabHelper.IabAsyncInProgressException e) {
            e.printStackTrace();
        } catch (IllegalArgumentException e) {
            e.printStackTrace();
        }
        mHelper = null;
    }

    @Override
    protected void onActivityResult(int requestCode, int resultCode, Intent data) {
        if (!mHelper.handleActivityResult(requestCode, resultCode, data)) {
            // not handled, so handle it ourselves (here's where you'd
            // perform any handling of activity results not related to in-app
            // billing...
            super.onActivityResult(requestCode, resultCode, data);
        }
    }

    @OnClick(R.id.btnContinue)
    public void clickContinue(View v) {
        PurchaseItem item = adapter.getSelected();

        try {
            mHelper.launchPurchaseFlow(activity, item.getId(), RC_REQUEST, mPurchaseFinishedListener, "");
        } catch (IabHelper.IabAsyncInProgressException e) {
            Log.d(TAG, "onProductClick: " + e.getMessage());
        }
    }

    IabHelper.OnIabPurchaseFinishedListener mPurchaseFinishedListener = new IabHelper.OnIabPurchaseFinishedListener() {
        @Override
        public void onIabPurchaseFinished(IabResult result, me.proft.sandbox.utils.billing.Purchase purchase) {
            Log.d(TAG, "Purchase finished: " + result + ", purchase: " + purchase);

            // if we were disposed of in the meantime, quit.
            if (mHelper == null) return;

            if (result.isFailure()) {
                Toast.makeText(activity, "Error purchasing: " + result, Toast.LENGTH_SHORT).show();
                return;
            }

            Log.d(TAG, "Purchase successful." + purchase);

            try {
                mHelper.consumeAsync(purchase, mConsumeFinishedListener);
            } catch (IabHelper.IabAsyncInProgressException e) {
                e.printStackTrace();
            }
        }
    };

    IabHelper.OnConsumeFinishedListener mConsumeFinishedListener = new IabHelper.OnConsumeFinishedListener() {
        @Override
        public void onConsumeFinished(me.proft.sandbox.utils.billing.Purchase purchase, IabResult result) {
            Log.d(TAG, "Consumption finished. Purchase: " + purchase + ", result: " + result);

            // if we were disposed of in the meantime, quit.
            if (mHelper == null) return;

            if (result.isSuccess()) {
                Log.d(TAG, "Consumption successful. Provisioning." + purchase.getSku());
            } else {
                Log.d(TAG, "Error while consuming: " + result);
            }
            Log.d(TAG, "End consumption flow.");
        }
    };
}
You can get Base64-encoded RSA public key in Google Play Console * -> APP -> Development tools -> Services & APIs*.
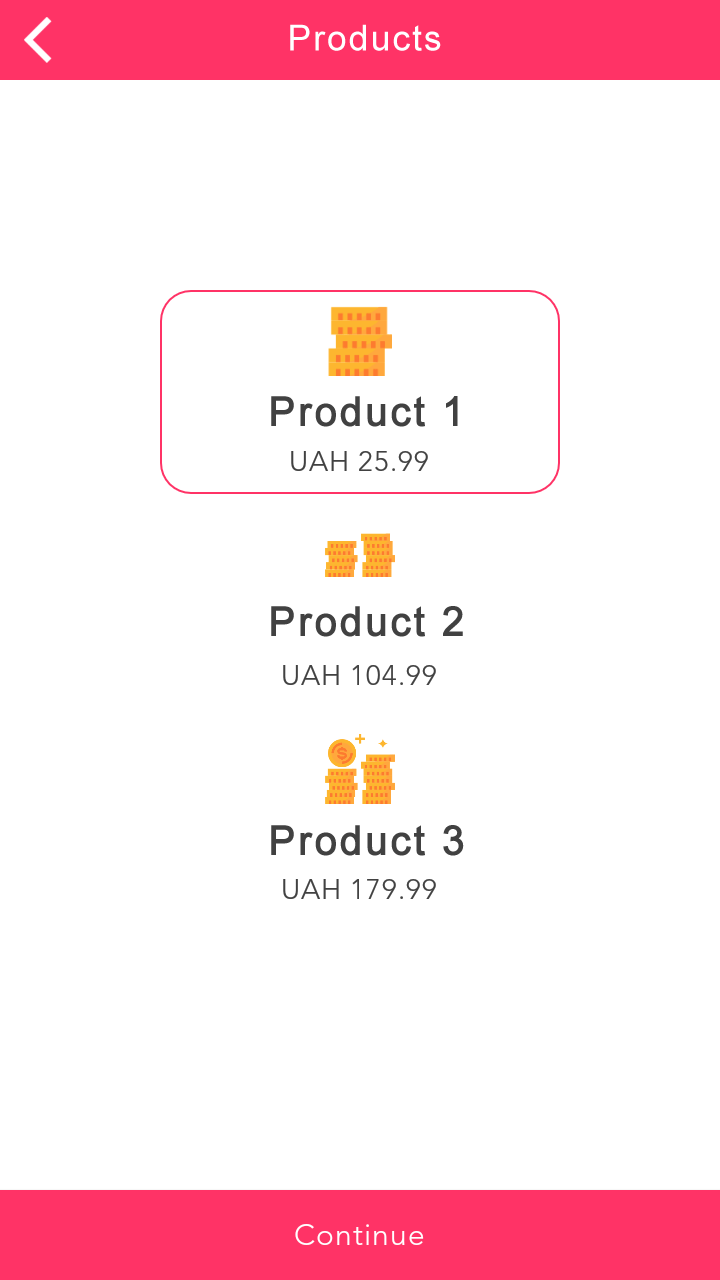
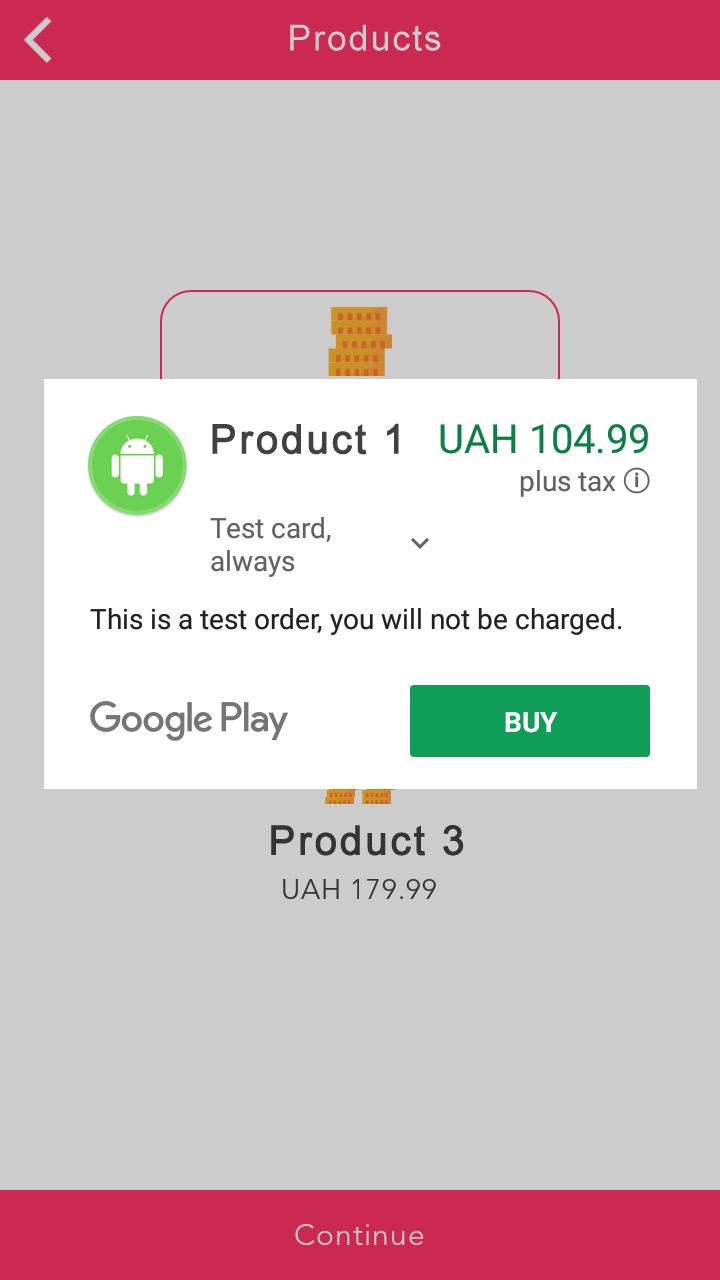
Compile and run the application on a physical Android device with Google Play support and click on the "Continue" button. This should cause the Google Play purchase dialog to appear listing the test item.
Testing Google Play Billing
In order to be eligible for test purchases, there are a few steps to go through:
- Your APK must be uploaded to the Play Console (drafts are no longer supported)
- Add license testers in the Play Console
- Have testers join the alpha/beta testing group (if available)
- Wait 15 minutes, then start testing
So, to test Google Play Billing, you need to publish your app to an alpha or beta channel in Google Play. After you publish an app to an alpha or beta channel, it can take a few hours for the app to be available for testers.
You can test on any Android-powered hardware device running Android 1.6 or higher. The most current version of the Google Play application must be installed on the device.
It’s easy to set up test purchases — any user account can be chosen to be a test account, and any user of a test account can make test purchases with no charge.
First, upload and publish in-app products that you want testers to be able to purchase. You can upload and publish in-app products in the Play Console. Note that you can upload and publish your in-app items before you publish the APK itself.
Next, create license test accounts for authorized users. In the Developer Console, go to Settings > Account details, then in the License Testing section, add the addresses to Gmail accounts with testing access field.
Once you’ve added the users as license tester accounts and saved the change, within 15 minutes those users can begin making test purchases of your in-app products.
Important. After you publish your app to an alpha or beta channel, your testers need to opt-in to your app’s alpha or beta test using the provided opt-in URL before they can make test purchases. You can see opt-in URL in Developer Console > APP > Release management > App releases > Manage internal test.
Note. License test accounts must be on the user’s Android device. If the device has more than one account, the purchase will be made with the account that downloaded the app. If none of the accounts has downloaded the app, the purchase is made with the first account. Users can confirm the account that is making a purchase by expanding the purchase dialog.
Authorized license test accounts are associated with your developer account in Google Play, rather than with a specific APK or package name. Identifying an account as a test account enables it to purchase any of your in-app products without being charged.
Note. If you want to be able to perform a test purchase on an inapp item more than once, you need to mark the item as consumed after each purchase. To do so, call consumeAsync().
Note. Taxes are not computed or assessed for test purchases.
Check list for troubleshooting
If you are getting following error "This version of the application is not configured for billing through Google Play" please check following list.
Prerequisites:
- AndroidManifest.xml must include "com.android.vending.BILLING" permission.
- APK is built in release mode.
- APK is signed with the release certificate(s).
- APK is uploaded to alpha/beta distribution channel (previously - as a draft) to the developer console at least once. (takes some time ~2h-24h).
- IAB products are published and their status set to active.
- Test account(s) is added in developer console.
Testing requirements:
- Test APK has the same versionCode as the one uploaded to developer console.
- Test APK is signed with the same certificate(s) as the one uploaded to dev.console.
- Test account (not developer) - is the main account on the device.
- Test account is opted-in as a tester and it's linked to a valid payment method.
Useful links
Quote
Categories
- Android
- AngularJS
- Databases
- Development
- Django
- iOS
- Java
- JavaScript
- LaTex
- Linux
- Meteor JS
- Python
- Science
Archive ↓
- September 2024
- December 2023
- November 2023
- October 2023
- March 2022
- February 2022
- January 2022
- July 2021
- June 2021
- May 2021
- April 2021
- August 2020
- July 2020
- May 2020
- April 2020
- March 2020
- February 2020
- January 2020
- December 2019
- November 2019
- October 2019
- September 2019
- August 2019
- July 2019
- February 2019
- January 2019
- December 2018
- November 2018
- August 2018
- July 2018
- June 2018
- May 2018
- April 2018
- March 2018
- February 2018
- January 2018
- December 2017
- November 2017
- October 2017
- September 2017
- August 2017
- July 2017
- June 2017
- May 2017
- April 2017
- March 2017
- February 2017
- January 2017
- December 2016
- November 2016
- October 2016
- September 2016
- August 2016
- July 2016
- June 2016
- May 2016
- April 2016
- March 2016
- February 2016
- January 2016
- December 2015
- November 2015
- October 2015
- September 2015
- August 2015
- July 2015
- June 2015
- February 2015
- January 2015
- December 2014
- November 2014
- October 2014
- September 2014
- August 2014
- July 2014
- June 2014
- May 2014
- April 2014
- March 2014
- February 2014
- January 2014
- December 2013
- November 2013
- October 2013