Data binding tutorial for Android Android 02.01.2017

- Introduction
- Update value with clickListener
- Data binding in fragment
- Data binding expressions
- Binding adapters (custom setters)
- RecyclerView
- Two Way Binding
Data binding is a mechanism to make a bridge between Presentation layer and Model layer, where Presentation layer contains UI widgets like TextView, EditText, List etc. and Model layer contains entities which hold information.
When Data binding was not there, we are using traditional way to display model information in UI using getter and setter methods. Like, we have a Model class which represents entity information and we have references to UI widgets and getter methods from which we fetch data and display it over UI.
There are two types of Data binding:
- One-way data binding. One-way Data binding is when data flows in only one direction, which is, from the model or the data to the UI. An example of it can be when a
TextViewsets its data from a variable and keeps the text of the view updated with the variable whenever the variable changes. - Two-way data binding. With two-way Data binding the data flows in both directions, i.e., from the model to the UI and from the UI to the model. An example would be
TextViewandEditText- theTextViewshows the contents ofEditText. If I bindEditTextandTextViewwith the model in two-way binding, when we write some text inEditText, the data ofEditTextis passed to the model or variable, which is the flow from UI to model. When the variable is updated, it is bound withTextView, so the contents ofTextVieware also updated, and this flow is from the model or the variable to the UI.
Android Data binding support library has been released along with Android Marshmallow. Being a support library, Data binding is therefore available in all Android versions back to SDK v7.
To enable Data binding in your project, Gradle 1.5.0 and higher is required and the following lines present in the module level build.gradle file of your project:
android {
    ...
    dataBinding {
        enabled = true
    }
}
After a project sync, you can make full use of the Data binding in Android.
We will create a simple Model class with this properties.
public class Movie {
    private String title;
    private String image;
    private int year;

    public Movie(String title, int year) {
        this.title = title;
        this.year = year;
    }

    public String getTitle() { return title; }
    public void setTitle(String title) { this.title = title; }

    public int getYear() { return year; }
    public void setYear(int year) { this.year = year; }

    public String getImage() { return image; }
    public void setImage(String image) { this.image = image; }
}
Data binding layout files must be configured slightly differently from default layout files. There are a couple of files that could be generated automatically, and if the project doesn’t use data binding, the files would be needlessly generated.
To enable Data binding for your layout, simply wrap your existing elements in a layout element. Declare a variable of your Model class. Open your layout file and add layout tag as root of it. It is necessary to have layout tag and data tag. It holds information about which model(s) is/are using in layout.
<?xml version="1.0" encoding="utf-8"?>
<layout xmlns:android="http://schemas.android.com/apk/res/android">
    <data>
        <variable name="movie" type="me.proft.databindingdemo.Model.Movie"/>
    </data>
    ...
</laoyout>
We tell layout that we want to use Movie model class in this layout. Now tell each widget which properties they are going to use. To access any member of Movie class.
android:text="@{movie.title}"
Here’s an explanation for tags in the layout
<layout>- we place the root element between this tag to tell the compiler that layout file pertains to the binding. It is worth noting that you should always put it in the root.<data>is always put in the layout and serves as as wrapper for variables used in the layout.<variable>contains name and type describing the name of the variable and its full name respectively (including the package name).@{}container used for describing the expression. For example, putting name and surname in one string or simple field display.
In the XML layout file, we can also define onClick attributes referring to specific implementations in the Movie class.
android:onClick="@{movie.onReadMoreClicked}"
Here is full layout file code. Don’t forget to replace me.proft.databindingdemo.model.Movie with you package name.
<?xml version="1.0" encoding="utf-8"?>
<layout xmlns:android="http://schemas.android.com/apk/res/android">
    <data>
        <variable name="movie" type="me.proft.databindingdemo.model.Movie"/>
        <variable name="view" type="android.view.View" />
    </data>
    <LinearLayout
        android:orientation="vertical"
        android:layout_width="match_parent"
        android:layout_height="match_parent">

        <LinearLayout
            android:orientation="horizontal"
            android:layout_width="match_parent"
            android:layout_height="wrap_content">

            <TextView
                android:layout_width="100dp"
                android:layout_height="wrap_content"
                android:text="Title:"
                android:textSize="22sp"/>

            <TextView
                android:id="@+id/tvTitle"
                android:layout_width="wrap_content"
                android:layout_height="wrap_content"
                android:text="@{movie.title}"
                android:textSize="22sp"/>

        </LinearLayout>

        <LinearLayout
            android:orientation="horizontal"
            android:layout_width="match_parent"
            android:layout_height="wrap_content">

            <TextView
                android:layout_width="100dp"
                android:layout_height="wrap_content"
                android:text="Year:"
                android:textSize="22sp"/>

            <TextView
                android:id="@+id/tvYear"
                android:layout_width="wrap_content"
                android:layout_height="wrap_content"
                android:text="@{String.valueOf(movie.year)}"
                android:textSize="22sp"/>
        </LinearLayout>
    </LinearLayout>
</layout>
If you noticed, I used android:text="@{String.valueOf(movie.year)}" in layout. Why? Because year is an Integer argument and we can not directly set it to TextView.
Now, we require to bind views to model in our Activity.
With data binding, a Binding class is auto generated from your layout file. When you use data tag in your layout, Android will auto generate a class with layout filename and a suffix Binding. For example, your layout file name is activity_main.xml then your autogenerated class name will be ActivityMainBinding. This class holds all binding i.e. movie in our case.
Below is full activity code in wich we establish Data binding with the use of Java code.
import me.proft.databindingdemo.model.Movie;
import me.proft.databindingdemo.ActivityMainBinding;

public class MainActivity extends AppCompatActivity {
    Movie movie;

    @Override
    protected void onCreate(Bundle savedInstanceState) {
        super.onCreate(savedInstanceState);
        setContentView(R.layout.activity_main);

        ActivityMainBinding binding =
                DataBindingUtil.setContentView(this, R.layout.activity_main);
        movie = new Movie("Movie 1", 2017);
        binding.setMovie(movie);
    }
}
Update value with clickListener
We have seen how to bind value without declaring TextView object and without using setText() at runtime. Now we will see how to update those values on any Button/View click.
In order to make use of automatic view updates, there are three options you could go with. You could either create
- Observable object
- Observable fields
- Observable collections
The easiest way to go for a developer is to use a data class implementing the Observable interface. Android provides a convenience class BaseObservable which your data classes can extend and which takes care of listener registration. The developer is, however, still responsible for notifying of property changes. This is done by assigning the @Bindable annotation to the property getter and notifying in the property setter.
So, change your Movie class by extending BaseObservable. Update getter methods by using @Bindable annotation. Update setter methods to notify property for changing its value for that use notifyPropertyChanged.
Here BR is auto generated class like R file. If you see something like BR cannot resolve symbol you should Clean Project and then Build Project in Android Studio.
public class Movie extends BaseObservable {
    private String title;
    private String image;
    private int year;

    public Movie(String title, int year) {
        this.title = title;
        this.year = year;
    }

    @Bindable
    public String getTitle() { return title; }

    public void setTitle(String title) {
        this.title = title;
        notifyPropertyChanged(BR.title);
    }

    @Bindable
    public int getYear() { return year; }

    public void setYear(int year) {
        this.year = year;
        notifyPropertyChanged(BR.title);
    }

    @Bindable
    public String getImage() { return image; }
    public void setImage(String image) { this.image = image; }
}
Next step is define Button in xml file
<Button
    android:layout_width="wrap_content"
    android:layout_height="wrap_content"
    android:layout_gravity="center_horizontal"
    android:text="Update"
    android:onClick="updateMovie"/>
Final step is update click event and call setter method to update TextView.
public void updateMovie(View v) {
    movie.setTitle("Cartoon");
}
To access the binding within an activity you inflate your layout using the DataBindinUtil class method setContentView() instead of the version provided by the Activity. This method returns a ViewDataBinding instance specific to the layout inflated. Following is example of inflate from within a fragment.
@Override
public View onCreateView(LayoutInflater inflater, ViewGroup container,Bundle savedInstanceState) {
   MovieFragmentBinding binding = DataBindingUtil.inflate(inflater, R.layout.movie_fragment, container, false);

   movie = new Movie("Movie 1", 2017);
   binding.setMovie(movie);

   return binding.getRoot();
}
Notice that the root view of the inflated layout is returned in onCreateView obtained from the ViewBinding instance. The only method that needs to be called on the binding class is the setMovie method, and now this instance is tied to the UI.
DataBinding has its own expression language for layout files. The expressions used for Data binding are very identical to Java expressions. Some of the Java expressions available include
- Mathematical (+ – / * %)
- String concatenation (+)
- Logical (&& ||)
- Binary (& | ^)
- Unary (+ – ! ~)
- Comparison (== > = > >>> <<)
- instanceof
We can set visibility of widget as following. First, in the data section of the layout tag, we define two variables: movie which is of type me.proft.databindingdemo.Movie and refers to our previously described Movie data class; and view of type android.view.View which refers to the Android View class. The latter is used for accessing the view’s visibility constants in Android data binding expressions.
<Button
    android:id="@+id/btnHide"
    android:layout_width="wrap_content"
    android:layout_height="wrap_content"
    android:text="Hide old"
    android:visibility="@{movie.year < 2016 ? View.GONE : View.VISIBLE}" />
or hide widget if field is empty
android:visibility="@{TextUtils.isEmpty(movie.title) ? View.GONE : View.VISIBLE}"
android:text="@{movie.title}"
Another very interesting and useful operator is the null coalescing operator (??), which evaluates to the left operand if it isn’t null, or the right if the left is null.
android:text="@{user.displayname ?? user.firstname}"
Binding adapters (custom setters)
Binding adapters are useful if you want to override the functionality of what an attribute does or want to introduce your own XML attribute to do some work.
For instance, if you want to set an image in your ImageView in XML, but the image is a URL for a resource on your server, the URL of the image is stored in the model you set on your layout file. So binding adapters can help you here.
Add ImageView to layout
<ImageView
    android:id="@+id/image"
    android:layout_width="50dp"
    android:layout_height="50dp"
    app:imageUrl="@{movie.image}"/>
Add following method to Movie model
@BindingAdapter({"bind:imageUrl"})
public static void loadImage(ImageView view, String url) {
    Glide.with(view.getContext()).load(url).crossFade().centerCrop().into(view);
}
Add following code in MainActivity after Movie initialization
movie = new Movie("Movie 1", 2017);
movie.setImage("http://en.proft.me/media/android/android_realm.png");
binding.setMovie(movie);
We create binding adapter method by annotating it with the @BindingAdapter. We pass in the attribute we want to override. In method parameters, the first parameter should be the type of view you want this annotation to be on, and the other should be the type of value in the parameter that you set in the annotation. Then, inside the method, you can do anything with the parameter and the view. This is how a simple binding adapter can be written.
Another example is change layout_marginBottom
@BindingAdapter({"android:layout_marginBottom"})
public static void setLayoutMarginBottom(View v, int bottomMargin) {
   ViewGroup.MarginLayoutParams layoutParams =
           (ViewGroup.MarginLayoutParams) v.getLayoutParams();

   if (layoutParams != null) {
       layoutParams.bottomMargin = bottomMargin;
   }
}
So, setters are annotated with the @BindingAdapter annotation and takes the layout attribute name as argument, for which the binding adapter should be called.
The method must be public static void and must accept as parameters first the view type for which the binding adapter should be called and then the data to be bound with your desired type.
In this snippet we will learn how to integrate RecyclerView with android Data binding. Don't forget to add compile 'com.android.support:recyclerview-v7:23.3.0' to build.gradle file.
Create a layout for RecyclerView list items (movie_list_item.xml file)
<?xml version="1.0" encoding="utf-8"?>
<layout xmlns:android="http://schemas.android.com/apk/res/android"
    xmlns:app="http://schemas.android.com/apk/res-auto"
    xmlns:tools="http://schemas.android.com/tools">
     <data>
         <variable
            name="movie"
            type="me.proft.databindingdemo.model.Movie" />
     </data>

    <LinearLayout
        android:layout_width="match_parent"
        android:layout_height="wrap_content"
        android:orientation="vertical">

        <TextView
            android:layout_width="wrap_content"
            android:layout_height="wrap_content"
            android:text="@{movie.title}"
            android:textAppearance="?android:attr/textAppearanceLarge"
            tools:text="Title" />

        <TextView
            android:layout_width="wrap_content"
            android:layout_height="wrap_content"
            android:text="@{String.valueOf(movie.year)}"
            tools:text="Year" />
    </LinearLayout>
</layout>
Here movie will be model class reference variable, you can have any number of variables as you need. <layout> will contain your model class information using which you will notify your controls about value they are going to show.
Create an adapter for RecyclerView called MovieAdapter.
public class MovieAdapter extends RecyclerView.Adapter<MovieAdapter.ViewHolder> {
    private ArrayList<Movie> list;

    public MovieAdapter(ArrayList<Movie> list) {
        this.list = list;
    }

    @Override
    public MovieAdapter.ViewHolder onCreateViewHolder(ViewGroup parent, int viewType) {
        View container = LayoutInflater.from(parent.getContext()).inflate(R.layout.movie_list_item, parent, false);
        return new MovieAdapter.ViewHolder(container);
    }

    @Override
    public void onBindViewHolder(ViewHolder holder, int position) {
        Movie movie = list.get(position);
        holder.bindMovie(movie);
    }

    @Override
    public int getItemCount() {
        return list.size();
    }

    class ViewHolder extends RecyclerView.ViewHolder {
        private MovieListItemBinding binding;
        public ViewHolder(View v) {
            super(v);
            binding = DataBindingUtil.bind(v);
        }

        public void bindMovie(Movie movie) {
            binding.setMovie(movie);
        }
    }
}
Here
binding = DataBindingUtil.bind(v)will create binding for yourmovie_list_itemlayout and return view.binding.setMovie(movie)will setMoviedata toRecyclerViewitems.
Write XML code for your activity/fragment layout
<layout xmlns:android="http://schemas.android.com/apk/res/android"
    xmlns:app="http://schemas.android.com/apk/res-auto">

    <RelativeLayout
        android:layout_width="match_parent"
        android:layout_height="match_parent">

        <android.support.v7.widget.RecyclerView
            android:id="@+id/rvMovie"
            android:layout_width="match_parent"
            android:layout_height="wrap_content"
            app:layoutManager="android.support.v7.widget.LinearLayoutManager"/>

        <Button
            android:layout_width="wrap_content"
            android:layout_height="wrap_content"
            android:onClick="addMovie"
            android:layout_below="@id/rvMovie"
            android:text="Add" />

    </RelativeLayout>
</layout>
Write your code in activity/fragment to attach adapter to Recyclerview.
public class MainActivity extends AppCompatActivity {
private ActivityMainBinding binding;
private ArrayList<Movie> list = new ArrayList<>();
private MovieAdapter adapter;
@Override
protected void onCreate(Bundle savedInstanceState) {
super.onCreate(savedInstanceState);
binding = DataBindingUtil.setContentView(this, R.layout.activity_main);
fillData();
adapter = new MovieAdapter(list);
binding.recycler.setAdapter(adapter);
}
private void fillData() {
list.add(new Movie("Movie 1", 2015));
list.add(new Movie("Movie 2", 2016));
list.add(new Movie("Movie 3", 2017));
}
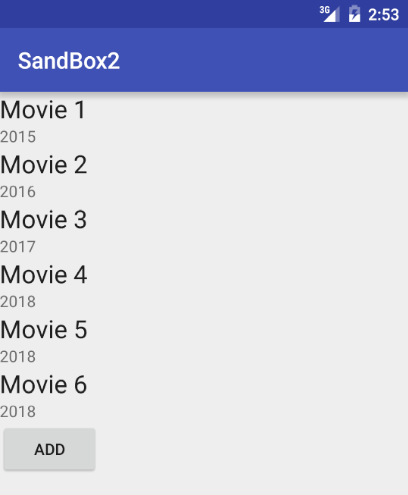
public void addMovie(View v) {
int length = list.size() + 1;
list.add(new Movie("Movie " + String.valueOf(length), 2018));
adapter.notifyItemInserted(length);
}
}
Result
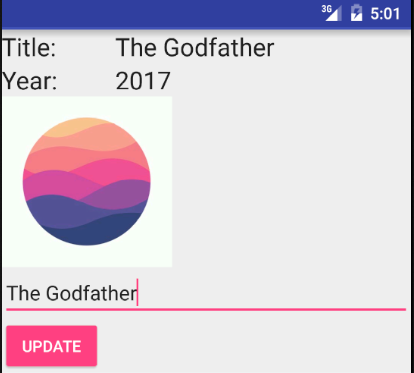
Till now we have seen how to set values to XML view, but in controls like EditText we need to fetch value. In simple term two-way Data binding is setting values to that control and fetching it after having some changes.
Simple add EditText to layout from Introduction section.
<EditText
    android:layout_width="match_parent"
    android:layout_height="wrap_content"
    android:hint="Title"
    android:text="@={movie.title}"/>
By adding = sign in your expression we switch on support of two-way Data binding.
Result
Quote
Categories
- Android
- AngularJS
- Databases
- Development
- Django
- iOS
- Java
- JavaScript
- LaTex
- Linux
- Meteor JS
- Python
- Science
Archive ↓
- December 2023
- November 2023
- October 2023
- March 2022
- February 2022
- January 2022
- July 2021
- June 2021
- May 2021
- April 2021
- August 2020
- July 2020
- May 2020
- April 2020
- March 2020
- February 2020
- January 2020
- December 2019
- November 2019
- October 2019
- September 2019
- August 2019
- July 2019
- February 2019
- January 2019
- December 2018
- November 2018
- August 2018
- July 2018
- June 2018
- May 2018
- April 2018
- March 2018
- February 2018
- January 2018
- December 2017
- November 2017
- October 2017
- September 2017
- August 2017
- July 2017
- June 2017
- May 2017
- April 2017
- March 2017
- February 2017
- January 2017
- December 2016
- November 2016
- October 2016
- September 2016
- August 2016
- July 2016
- June 2016
- May 2016
- April 2016
- March 2016
- February 2016
- January 2016
- December 2015
- November 2015
- October 2015
- September 2015
- August 2015
- July 2015
- June 2015
- February 2015
- January 2015
- December 2014
- November 2014
- October 2014
- September 2014
- August 2014
- July 2014
- June 2014
- May 2014
- April 2014
- March 2014
- February 2014
- January 2014
- December 2013
- November 2013
- October 2013