Android Camera1 API guide Android 30.08.2016

Camera1 API
Using the camera to take photos is relatively easy. It is somewhat harder to setup the camera preview to work properly.
Using the camera on the Android device can be done via the integration of existing camera application. In this case you would start the existing Camera application via an intent and use the return data of the application to access the result.
Alternatively you can also directly integrate the camera into your application via the Camera API.
This application will capture an image and save it to the image directory using Camera API.
Let's start!
Add the android.permission.CAMERA permission to access your camera and the android.permission.WRITE_EXTERNAL_STORAGE to be able to write to the SD card to your AndroidManifest.xml file.
<uses-permission android:name="android.permission.CAMERA" />
<uses-permission android:name="android.permission.WRITE_EXTERNAL_STORAGE" />
<uses-feature android:name="android.hardware.camera" />
For demo purpose I have created a simple layout with GridView. Change the activity_main.xml file in the res/layout folder to the following
<LinearLayout xmlns:android="http://schemas.android.com/apk/res/android"
    xmlns:tools="http://schemas.android.com/tools" android:layout_width="match_parent"
    android:layout_height="match_parent"
    android:orientation="vertical"
    tools:context=".MainActivity">

    <GridView android:id="@+id/gvPhotos"
        android:layout_height="match_parent"
        android:layout_width="match_parent"
        android:padding="10dp"
        android:verticalSpacing="10dp"
        android:horizontalSpacing="10dp"
        android:numColumns="auto_fit"
        android:columnWidth="100dp"
        android:stretchMode="columnWidth"
        android:gravity="center" />
</LinearLayout>
MainActivity will hold GridView with all saved photos.
import android.content.Intent;
import android.graphics.Bitmap;
import android.graphics.BitmapFactory;
import android.graphics.drawable.BitmapDrawable;
import android.graphics.drawable.Drawable;
import android.os.Environment;
import android.support.v7.app.ActionBar;
import android.support.v7.app.AppCompatActivity;
import android.os.Bundle;
import android.view.Menu;
import android.view.MenuItem;
import android.widget.GridView;

import java.io.File;
import java.util.ArrayList;
import java.util.List;

public class MainActivity extends AppCompatActivity {
    private GridView gvPhotos;
    private PhotoAdapter adPhotos;
    public static final String REQUEST_RESULT="REQUEST_RESULT";

    @Override
    protected void onCreate(Bundle savedInstanceState) {
        super.onCreate(savedInstanceState);
        setContentView(R.layout.activity_main);

        ActionBar actionBar = getSupportActionBar();
        actionBar.setLogo(R.drawable.ic_launcher);
        actionBar.setDisplayUseLogoEnabled(true);
        actionBar.setDisplayShowHomeEnabled(true);


        adPhotos = new PhotoAdapter(this, getPhotos());

        gvPhotos = (GridView)findViewById(R.id.gvPhotos);
        gvPhotos.setAdapter(adPhotos);
    }

    @Override
    public boolean onCreateOptionsMenu(Menu menu) {
        getMenuInflater().inflate(R.menu.menu_main, menu);
        return super.onCreateOptionsMenu(menu);
    }

    @Override
    public boolean onOptionsItemSelected(MenuItem item) {
        switch (item.getItemId()) {
            case R.id.menu_photo:
                Intent i = new Intent(this, TakePhotoActivity.class);
                startActivityForResult(i, 1);
                break;
            default:
                break;
        }
        return true;
    }

    @Override
    protected void onActivityResult(int requestCode, int resultCode, Intent data) {
        super.onActivityResult(requestCode, resultCode, data);
        if (resultCode == RESULT_OK) {
            adPhotos.setPhotos(getPhotos());
        }
    }

    public List<Drawable> getPhotos() {
        File rootDir = Environment.getExternalStoragePublicDirectory(Environment.DIRECTORY_PICTURES);
        File pictureDir = new File(rootDir, "CV");
        List<Drawable> list = new ArrayList<>();

        // fix java.lang.OutOfMemoryError
        BitmapFactory.Options options = new BitmapFactory.Options();
        options.inSampleSize = 8;

        for(File f : pictureDir.listFiles()){
            Bitmap original = BitmapFactory.decodeFile(f.getAbsolutePath(), options);
            Drawable drawable = new BitmapDrawable(getResources(), original);
            list.add(drawable);
        }

        return list;
    }
}
Create new class PhotoAdapter for our GridView
import android.content.Context;
import android.graphics.drawable.Drawable;
import android.view.View;
import android.view.ViewGroup;
import android.widget.BaseAdapter;
import android.widget.GridView;
import android.widget.ImageView;

import java.util.List;

public class PhotoAdapter extends BaseAdapter {
    private Context ctx;
    List<Drawable> list;

    public PhotoAdapter(Context ctx, List<Drawable> list) {
        this.ctx = ctx;
        this.list = list;
    }

    public int getCount() {
        return list.size();
    }

    public Object getItem(int position) {
        return position;
    }

    public long getItemId(int position) {
        return position;
    }

    public void setPhotos(List<Drawable> list) {
        this.list = list;
        notifyDataSetChanged();
    }

    public View getView(int position, View convertView, ViewGroup parent) {
        ImageView imageView;
        if (convertView == null) {
            imageView = new ImageView(ctx);
            imageView.setLayoutParams(new GridView.LayoutParams(185, 185));
            imageView.setScaleType(ImageView.ScaleType.CENTER_CROP);
            imageView.setPadding(5, 5, 5, 5);
        } else {
            imageView = (ImageView) convertView;
        }
        imageView.setImageDrawable(list.get(position));
        return imageView;
    }
}
Menu file
<?xml version="1.0" encoding="utf-8"?>
<menu xmlns:android="http://schemas.android.com/apk/res/android"
    xmlns:app="http://schemas.android.com/apk/res-auto">

    <item android:id="@+id/menu_photo"
        android:title="Take photo"
        app:showAsAction="ifRoom"
        android:icon="@android:drawable/ic_menu_camera"
        >
    </item>

</menu>
Create the following TakePhotoActivity class which will be responsible for taking the photo and saving to the SD card. I'm going to use TextureView to display a content stream. Unlike SurfaceView, TextureView does not create a separate window but behaves as a regular View. This key difference allows a TextureView to be moved, transformed, animated, etc.
In order to use TextureView, all you need to do is get its SurfaceTexture. The SurfaceTexture can then be used to render content. In order to do this, you just need to do instantiate an object of this class and implement SurfaceTextureListener interface.
Then we need to override the below methods to complete implementation
public void onSurfaceTextureAvailable(SurfaceTexture arg0, int arg1, int arg2)- invoked when aTextureView'sSurfaceTextureis ready for use.public boolean onSurfaceTextureDestroyed(SurfaceTexture arg0)- invoked when the specifiedSurfaceTextureis about to be destroyed.public void onSurfaceTextureSizeChanged(SurfaceTexture arg0, int arg1,int arg2)- invoked when theSurfaceTexture's buffers size changed.public void onSurfaceTextureUpdated(SurfaceTexture arg0)- invoked when the specifiedSurfaceTextureis updated throughupdateTexImage().
Any view that is displayed in the TextureView can be rotated and its alpha property can be adjusted by using setAlpha and setRotation methods.
import android.app.Activity;
import android.content.Context;
import android.content.Intent;
import android.content.pm.PackageManager;
import android.graphics.SurfaceTexture;
import android.os.Environment;
import android.os.Bundle;
import android.util.Log;
import android.view.TextureView;
import android.view.View;
import android.hardware.Camera;
import android.hardware.Camera.PictureCallback;
import android.widget.Toast;

import java.io.File;
import java.io.FileOutputStream;
import java.io.IOException;
import java.text.SimpleDateFormat;
import java.util.Date;


@SuppressWarnings("deprecation")
public class TakePhotoActivity extends Activity implements TextureView.SurfaceTextureListener {
    private final static String DEBUG_TAG = "APP";
    private final static String DIR_APP_PHOTO = "CV";
    private TextureView textureView;
    private Camera camera;
    private int cameraID = 0;

    public class PhotoHandler implements PictureCallback {
        private final Context context;

        public PhotoHandler(Context context) {
            this.context = context;
        }

        @Override
        public void onPictureTaken(byte[] data, Camera camera) {
            File rootDir = Environment.getExternalStoragePublicDirectory(Environment.DIRECTORY_PICTURES);
            File pictureDir = new File(rootDir, DIR_APP_PHOTO);

            if (!pictureDir.exists() && !pictureDir.mkdirs()) {
                Log.d(TakePhotoActivity.DEBUG_TAG, "Can't create directory to save image.");
                Toast.makeText(context, "Can't create directory to save image.",  Toast.LENGTH_LONG).show();
                return;
            }

            SimpleDateFormat dateFormat = new SimpleDateFormat("yyyymmddhhmmss");
            String date = dateFormat.format(new Date());
            String photoFile = "photo_" + date + ".jpg";
            String filename = pictureDir.getPath() + File.separator + photoFile;

            File pictureFile = new File(filename);

            try {
                FileOutputStream fos = new FileOutputStream(pictureFile);
                fos.write(data);
                fos.close();
                Toast.makeText(context, "Photo saved to " + photoFile, Toast.LENGTH_LONG).show();
            } catch (Exception error) {
                Log.d(TakePhotoActivity.DEBUG_TAG, "File" + filename + "not saved: " + error.getMessage());
                Toast.makeText(context, "Image could not be saved.", Toast.LENGTH_LONG).show();
            }

            Intent i = new Intent();
            i.putExtra(MainActivity.REQUEST_RESULT, photoFile);
            setResult(RESULT_OK, i);
            finish();
        }
    }

    private int findBackCamera() {
        int cameraID = -1;
        int numberOfCameras = Camera.getNumberOfCameras();
        for (int i = 0; i < numberOfCameras; i++) {
            Camera.CameraInfo info = new Camera.CameraInfo();
            Camera.getCameraInfo(i, info);
            if (info.facing == Camera.CameraInfo.CAMERA_FACING_BACK) {
                Log.d(DEBUG_TAG, "Camera found!");
                cameraID = i;
                break;
            }
        }
        return cameraID;
    }

    @Override
    protected void onCreate(Bundle savedInstanceState) {
        super.onCreate(savedInstanceState);
        setContentView(R.layout.take_photo_activity);

        if (!getPackageManager().hasSystemFeature(PackageManager.FEATURE_CAMERA)) {
            Toast.makeText(this, "No camera on this device", Toast.LENGTH_LONG).show();
        } else {
            cameraID = findBackCamera();
            if (cameraID < 0) {
                Toast.makeText(this, "No back camera found.", Toast.LENGTH_LONG).show();
            } else {
                camera = Camera.open(cameraID);
                textureView = (TextureView)findViewById(R.id.textureView);
                textureView.setSurfaceTextureListener(this);
            }
        }

    }

    public void onSurfaceTextureAvailable(SurfaceTexture surface, int width, int height) {
        if (camera != null) {
            try {
                Camera.Parameters parameters = camera.getParameters();
                parameters.setRotation(90);
                camera.setParameters(parameters);
                camera.setPreviewTexture(surface);
                camera.setDisplayOrientation(90);
                camera.startPreview();
            } catch (IOException e) {
                e.printStackTrace();
            }
        }
    }

    public boolean onSurfaceTextureDestroyed(SurfaceTexture surface) {
        if (camera != null) {
            camera.stopPreview();
            camera.release();
        }
        return true;
    }

    public void onSurfaceTextureSizeChanged(SurfaceTexture surface, int width, int height) {}
    public void onSurfaceTextureUpdated(SurfaceTexture surface) {}

    public void takePicture(View view) {
        if (camera != null) {
            camera.takePicture(null, null, new PhotoHandler(getApplicationContext()));
        }
    }
}
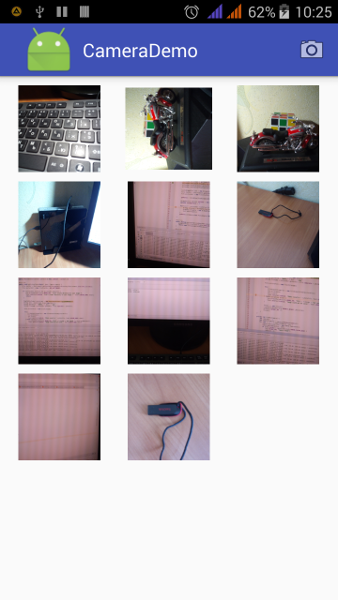
Result
Camera2 API
Compared with the old camera API, the Camera2 API introduced in the L is a lot more complex: more than ten classes are involved, calls (almost always) are asynchronized, plus lots of capture controls and meta data that you feel confused about.
Following are steps of using camera2 API
- Start from
CameraManager. - Setup the output targets.
- Get a
CameraDevice. - Create a
CaptureRequestfrom theCameraDevice. - Create a
CaptureRequestSessionfrom theCameraDevice. - Submit a
CaptureRequesttoCaptureRequestSession. - Get the
CaptureResults.
You can see example of Camera2 API in android-Camera2Basic github.
Quote
Categories
- Android
- AngularJS
- Databases
- Development
- Django
- iOS
- Java
- JavaScript
- LaTex
- Linux
- Meteor JS
- Python
- Science
Archive ↓
- September 2024
- December 2023
- November 2023
- October 2023
- March 2022
- February 2022
- January 2022
- July 2021
- June 2021
- May 2021
- April 2021
- August 2020
- July 2020
- May 2020
- April 2020
- March 2020
- February 2020
- January 2020
- December 2019
- November 2019
- October 2019
- September 2019
- August 2019
- July 2019
- February 2019
- January 2019
- December 2018
- November 2018
- August 2018
- July 2018
- June 2018
- May 2018
- April 2018
- March 2018
- February 2018
- January 2018
- December 2017
- November 2017
- October 2017
- September 2017
- August 2017
- July 2017
- June 2017
- May 2017
- April 2017
- March 2017
- February 2017
- January 2017
- December 2016
- November 2016
- October 2016
- September 2016
- August 2016
- July 2016
- June 2016
- May 2016
- April 2016
- March 2016
- February 2016
- January 2016
- December 2015
- November 2015
- October 2015
- September 2015
- August 2015
- July 2015
- June 2015
- February 2015
- January 2015
- December 2014
- November 2014
- October 2014
- September 2014
- August 2014
- July 2014
- June 2014
- May 2014
- April 2014
- March 2014
- February 2014
- January 2014
- December 2013
- November 2013
- October 2013