About RecyclerView in Android Android 19.06.2016
Contents
- Introduction
- Comparison between RecyclerView and ListView
- Example of RecyclerView
- Item click listener for RecyclerView
- Decorate item for RecyclerView
- Infinite scroll
- Grid via GridLayoutManager
- How to order items in RecyclerView via SortedList
- Building a RecyclerView with Kotlin
- Scroll to position
- Adding tools attributes for more pleasant UI developing
- LayoutAnimation
- Expandable RecyclerView Android
- Using DiffUtil (Kotlin)
- Using DiffUtil (Java)
The RecyclerView class, delivered as part of the v7 support library suite, is an improved version of the ListView and the GridView classes provided by the Android framework.
In other words, the RecyclerView is a new ViewGroup that is prepared to render any adapter-based view in a similar way.
The RecyclerView widget is a more advanced and flexible version of ListView. This widget is a container for displaying large data sets that can be scrolled very efficiently by maintaining a limited number of views. It requires you to use the ViewHolder pattern which improves performance as you avoid initializing views every time.
One advantage over ListView or GridView is the built in support for animations as items are added, removed, or repositioned. Moreover, respect to ListView, RecyclerView is much more customizable.
Unlike the ListView, the RecyclerView also provides a choice of three built-in layout managers to control the way in which the list items are presented to the user:
LinearLayoutManager- the list items are presented as either a horizontal or vertical scrolling list.GridLayoutManager- the list items are presented in grid format. This manager is best used when the list items of are of uniform size.StaggeredGridLayoutManager- the list items are presented in a staggered grid format. This manager is best used when the list items are not of uniform size.
For situations where none of the three built-in managers provide the necessary layout, custom layout managers may be implemented by subclassing the RecyclerView.LayoutManager class.
The implementation of RecyclerView requires a few classes to be implemented. The most important classes are listed in the following table.
| Class | Purpose | Optional |
|---|---|---|
| Adapter | Provides the data and responsible for creating the views for the individual entry. | Required |
| ViewHolder | Contains references for all views that are filled by the data of the entry | Required |
| LayoutManager | Contains references for all views that are filled by the data of the entry | Required, but default implementations available |
| ItemDecoration | Responsible for drawing decorations around or on top of the view container of an entry | Default behavior, but can be overridden |
| ItemAnimator | Responsible to define the animation if entries are added, removed or reordered | Default behavior, but can be overridden |

Comparison between RecyclerView and ListView
There are a lots of new features in RecyclerView that are not present in existing ListView. The RecyclerView is more flexible, powerful and a major enhancement over ListView. Here I will try to give you a detailed insight into it.
- Custom Item Layouts.
ListViewcan only layout the items in Vertical Arrangement and that arrangement cannot be customized according to our requirements. Suppose we need to create a horizontal list then that thing is not feasible with defaultListView. But with introduction ofRecyclerviewwe can easily create a horizontal or vertical List. By usingLayoutManagercomponent ofRecyclerViewwe can easily define the orientation of items. - Use Of ViewHolder Pattern.
ListViewadapters do not require the use ofViewHolderbutRecyclerViewrequire the use ofViewHolderthat is used to store the reference of view’s. InListViewit is recommended to use theViewHolderbut it is not compulsion but inRecyclerViewit is mandatory to useViewHolderwhich is the main difference betweenRecyclerViewandListView.ViewHolderis a static inner class in our Adapter which holds references to the relevant view’s. By using these references our code can avoid time consumingfindViewById()method to update the widgets with new data. - Adapters. In
ListViewwe use many adapter‘s likeArrayAdapterfor displaying simple array data,BaseAdapterandSimpleAdaptersfor custom lists. InRecyclerViewwe only useRecyclerView.Adapterto set the data in list. - Item Animator.
ListVieware lacking in support of good animation.RecyclerViewbrings a new dimensions in it. By usingRecyclerView.ItemAnimatorclass we can easily animate the view. - Item Decoration. In
ListViewdynamically decorating items like adding divider or border was not easy but inRecyclerViewby usingRecyclerView.ItemDecoratorclass we have a huge control on it.
Our plan is
- Create a new project using your Android Studio.
- Add
RecylerViewandCardViewdependencies to build.gradle (Module:app). - Add
RecylerViewto ouractivity_main.xmland complete this layout. - Create a new layout for single row of
RecyclerViewusingCardView. - Create a
RecylerViewHolderjava class forRecyclerviewby extendingRecyclerView.ViewHolder. - Create an
RecylerAdapterjava class forRecyclerviewby extendingRecyclerView.Adapter. - Set
RecylerViewinMainActivity.
1. Open your Android Studio and create a new project
2. Go to GradleScripts > build.gradle (Module:app) and add below libraries to this file under dependencies block. My dependencies block is
dependencies {
    compile fileTree(dir: 'libs', include: ['*.jar'])
    testCompile 'junit:junit:4.12'
    compile 'com.android.support:appcompat-v7:27.1.0'
    compile 'com.android.support:recyclerview-v7:27.1.0'
    compile 'com.android.support:cardview-v7:27.1.0'
}
3. Open your activity_main.xml file and add Recyclerview to it
<?xml version="1.0" encoding="utf-8"?>
<RelativeLayout
    xmlns:android="http://schemas.android.com/apk/res/android"
    xmlns:tools="http://schemas.android.com/tools"
    android:layout_width="match_parent"
    android:layout_height="match_parent"
    tools:context=".MainActivity">

    <android.support.v7.widget.RecyclerView
        xmlns:android="http://schemas.android.com/apk/res/android"
        android:id="@+id/rcView"
        android:layout_width="match_parent"
        android:layout_height="match_parent"
        android:clipToPadding="false"
        android:paddingBottom="16dp"
        android:paddingTop="16dp"
        android:scrollbars="vertical"
         />

</RelativeLayout>
4. Create a new layout for single row of Recyclerview using CardView.
CardView widget can be used to create simple cards. CardView extends the FrameLayout class and lets you show information inside cards that have a consistent look across the platform. CardView widgets can have shadows and rounded corners.
For single row of RecyclerView I am going to make a simple layout with one ImageView and two text for title and description. The complete layout is wrapped inside CardView to give it some good look. Here is my item_list.xml
<?xml version="1.0" encoding="utf-8"?>
<android.support.v7.widget.CardView xmlns:android="http://schemas.android.com/apk/res/android"
    android:id="@+id/cardView"
    android:layout_width="match_parent"
    android:layout_height="80dp"
    android:layout_marginBottom="8dp"
    android:layout_marginLeft="16dp"
    android:layout_marginRight="16dp"
    android:background="#C5CAE9"
    android:foreground="?attr/selectableItemBackground"
    android:theme="@style/ThemeOverlay.AppCompat.Dark.ActionBar">

    <RelativeLayout
        android:layout_width="match_parent"
        android:gravity="center"
        android:layout_height="match_parent">

        <ImageView
            android:id="@+id/avatar"
            android:layout_width="40dp"
            android:layout_height="40dp"
            android:layout_centerVertical="true"
            android:layout_alignParentLeft="true"
            android:layout_marginLeft="10dp"
            android:scaleType="centerCrop"
            android:src="@android:drawable/star_big_on" />

        <TextView
            android:id="@+id/title"
            android:layout_centerVertical="true"
            android:layout_width="match_parent"
            android:layout_height="wrap_content"
            android:layout_marginLeft="16dp"
            android:layout_toRightOf="@+id/avatar"
            android:text="Title"
            android:textColor="#000000"
            android:textAppearance="?attr/textAppearanceListItem"
            android:textSize="16sp" />

        <TextView
            android:id="@+id/desc"
            android:layout_width="match_parent"
            android:layout_height="wrap_content"
            android:layout_below="@+id/title"
            android:layout_marginLeft="16dp"
            android:layout_toRightOf="@+id/avatar"
            android:textColor="#000000"
            android:ellipsize="end"
            android:singleLine="true"
            android:text="Movie from IMDB 250"
            android:textAppearance="?attr/textAppearanceListItem"
            android:textSize="14sp" />
    </RelativeLayout>
</android.support.v7.widget.CardView>
5. Create a RecylerViewHolder java class for RecyclerView by extending RecyclerView.ViewHolder.
RecylerView uses a ViewHolder to store references to the views for one entry in the RecylerView. A ViewHolder class is typically a static inner class in your adapter which holds references to the relevant views. With these references your code can avoid the findViewById() method in an adapter to find the views which should be filled with your new data. This pattern avoids looking up the UI components all the time the system shows a row in the list and this is approximately 15% faster then using the findViewById() method.
Right click on your package and create a new java class name it RecyclerViewHolder and extends RecyclerView.ViewHolder. In this define two TextView and an ImageView of item_list.xml file. Copy and paste below code to your RecyclerViewHolder class. Here is my complete code of RecyclerViewHolder
import android.support.v7.widget.RecyclerView;
import android.view.View;
import android.widget.ImageView;
import android.widget.TextView;

public class RecyclerViewHolder extends RecyclerView.ViewHolder {
    TextView tv1, tv2;
    ImageView imageView;

    public RecyclerViewHolder(View itemView) {
        super(itemView);
        tv1 = (TextView) itemView.findViewById(R.id.title);
        tv2 = (TextView) itemView.findViewById(R.id.desc);
        imageView = (ImageView) itemView.findViewById(R.id.avatar);
    }
}
6. Create an RecylerAdapter java class for RecyclerView by extending RecyclerView.Adapter.
The adapter is a component that stands between the data model we want to show in our app UI and the UI component that renders this information. In other words, an adapter guides the way the information are shown in the UI.
To connect data set and view we need an adapter as you have already used adapter in Listview. But in case of RecyclerView we are not going to extend any base adapter or array adapter like ListView. For RecyclerView we are going to extend RecyclerView.Adapter in our Adapter class like below code. Create an new java class by right click on your package and name it RecyclerAdapter and extend RecyclerView.Adapter it will ask you to implement three method onCreateViewHolder(), onBindViewHolder(), getItemCount().
getItemCount()This method return the number of items present in the data.onCreateViewHolder()Inside this method we specify the layout that each item of theRecyclerViewshould use. This is done by inflating the layout usingLayoutInflater, passing the output to the constructor of the customViewHolder.onBindViewHolder()This method is very similar to thegetViewmethod of aListView's adapter. In our example, here's where you have to set theStringvalues toTextView.
Now we will complete some small things like we will make an array for title text. We will also make a context variable LayoutInflater and a constructor of Adapter class just copy and paste below code in your adapter class above all the methods.
import android.content.Context;
import android.support.v7.widget.RecyclerView;
import android.view.LayoutInflater;
import android.view.View;
import android.view.ViewGroup;
import android.widget.Toast;

public class RecyclerAdapter extends RecyclerView.Adapter<RecyclerViewHolder>{

    String[] name = {"The Shawshank Redemption", "The Godfather",
         "The Godfather: Part II", "The Dark Knight", "Schindler's List", "12 Angry Men", "Pulp Fiction"};
    Context context;
    LayoutInflater inflater;

    public RecyclerAdapter(Context context) {
        this.context = context;
        inflater = LayoutInflater.from(context);
    }

    @Override
    public RecyclerViewHolder onCreateViewHolder(ViewGroup parent, int viewType) {
        View v = inflater.inflate(R.layout.item_list, parent, false);

        RecyclerViewHolder viewHolder = new RecyclerViewHolder(v);
        return viewHolder;
    }

    @Override
    public void onBindViewHolder(RecyclerViewHolder holder, int position) {
        holder.tv1.setText(name[position]);
        holder.imageView.setOnClickListener(clickListener);
        holder.imageView.setTag(holder);
    }

    View.OnClickListener clickListener = new View.OnClickListener() {
        @Override
        public void onClick(View v) {
            RecyclerViewHolder vholder = (RecyclerViewHolder) v.getTag();
            int position = vholder.getPosition();
            Toast.makeText(context, "Position is " + position, Toast.LENGTH_LONG).show();
        }
    };

    @Override
    public int getItemCount() {
        return name.length;
    }
}
As you can see we inflate item_list.xml file inside onCreateViewHolder(). Also have made object of RecyclerViewHolder inside onCreateViewHolder and return this object like below code.
Inside onBindViewHolder() method we have set text to TextView from name array and also have made onClickListener for click on ImageView of row of RecyclerView.
And last step is to set number of items of RecyclerView so inside getItemCount() method we have returned number of items of name array.
7. Set RecylerView in MainActivity and complete everything.
Open your MainActivity.java and we will complete following steps
- Define
RecyclerViewand register. - Make an object of
RecyclerAdapterclass and setAdaptertoRecyclerView. - Set
LayoutManagertoRecyclerViewin my case I am usingLinearLayoutManager.
Here is complete code of MainActivity.java.
public class MainActivity extends AppCompatActivity {
    RecyclerView recyclerView;

    @Override
    protected void onCreate(Bundle savedInstanceState) {
        super.onCreate(savedInstanceState);
        setContentView(R.layout.activity_main);

        recyclerView = (RecyclerView) findViewById(R.id.rcView);

        RecyclerAdapter adapter = new RecyclerAdapter(this);
        recyclerView.setAdapter(adapter);
        recyclerView.setHasFixedSize(true);

        // layout manager for RecyclerView

        //int columns = 2;
        //GridLayoutManager lm = new GridLayoutManager(this, columns,
        //       GridLayoutManager.VERTICAL, false);
        //StaggeredGridLayoutManager lm = new StaggeredGridLayoutManager(columns,
        //       StaggeredGridLayoutManager.VERTICAL);
        //lm.setGapStrategy(StaggeredGridLayoutManager.GAP_HANDLING_NONE);

        LinearLayoutManager lm = new LinearLayoutManager(this, LinearLayoutManager.VERTICAL, false);
        recyclerView.setLayoutManager(lm);
    }
}
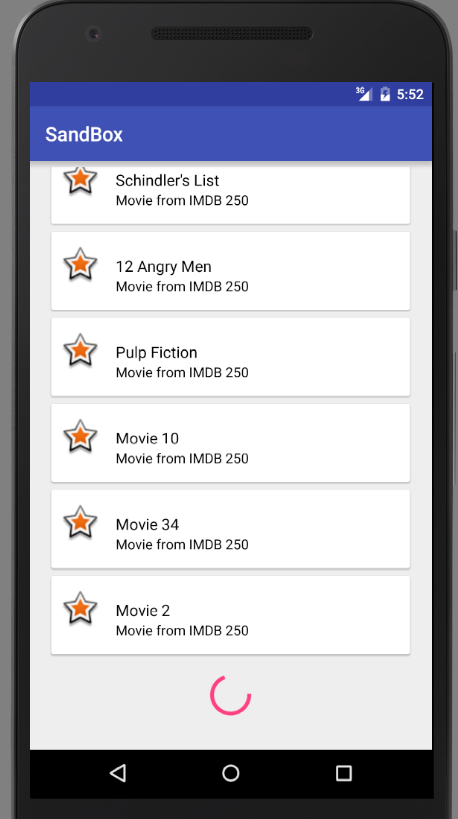
Result

Code on github
Item click listener for RecyclerView
In this section we'll handle user clicks on RecyclerView items. In other words, we want to know if the an user clicks on a item and what type of click he is making: simple click or long click.
When we use RecyclerView the things are a little more complex than ListView. In this case, we have to create a class that implements RecyclerView.OnItemTouchListener.
Right click on your package and create a new java class with name RecyclerItemListener and extends RecyclerView.OnItemTouchListener.
public class RecyclerItemListener
    implements RecyclerView.OnItemTouchListener  {

    private RecyclerTouchListener listener;
    private GestureDetector gd;

    public interface RecyclerTouchListener {
        public void onClickItem(View v, int pos);
        public void onLongClickItem(View v, int pos);
    }

    public RecyclerItemListener(Context ctx, final RecyclerView rv,
                                final RecyclerTouchListener listener) {
        this.listener = listener;
        gd = new GestureDetector(ctx,
             new GestureDetector.SimpleOnGestureListener() {
                 @Override
                 public void onLongPress(MotionEvent e) {
                   View v = rv.findChildViewUnder(e.getX(), e.getY());
                   listener.onLongClickItem(v, rv.getChildAdapterPosition(v));
                }

               @Override
               public boolean onSingleTapUp(MotionEvent e) {
                  View v = rv.findChildViewUnder(e.getX(), e.getY());
                  listener.onClickItem(v, rv.getChildAdapterPosition(v));
                  return true;
              }
         });
    }

    @Override
    public boolean onInterceptTouchEvent(RecyclerView rv, MotionEvent e) {
        View child = rv.findChildViewUnder(e.getX(), e.getY());
        return ( child != null && gd.onTouchEvent(e));
    }

    @Override
    public void onTouchEvent(RecyclerView rv, MotionEvent e) {}

    @Override
    public void onRequestDisallowInterceptTouchEvent(boolean disallowIntercept) {}
}
We define a callback interface to notify the listener when the user clicks on an item. The first thing is creating an instance of GestureDetector so that we can know when the user clicks and what click type he is doing.
Next, our class overrides onInterceptTouchEvent to know if the user selects and item and if the gesture detected is handled by our instance.
To receive notification, in the listener class we simply implements the interface declared above. Following snippet goes to onCreate of MainActivity
recyclerView.addOnItemTouchListener(new RecyclerItemListener(getApplicationContext(),
    recyclerView, new RecyclerItemListener.RecyclerTouchListener() {
        public void onClickItem(View v, int pos) {
            Toast.makeText(getApplicationContext(), "Simple click", Toast.LENGTH_LONG).show();
        }

        public void onLongClickItem(View v, int position) {
            Toast.makeText(getApplicationContext(), "Long click", Toast.LENGTH_LONG).show();
        }
}));
Decorate item for RecyclerView
In this section we'll customize the RecyclerView and add a row divider. To do it we have to implement a custom class that extends RecyclerView.ItemDecoration.
Right click on your package and create a new java class with name DividerItemDecoration and extends RecyclerView.ItemDecoration.
public class DividerItemDecoration extends RecyclerView.ItemDecoration {
    private Drawable div;

    public DividerItemDecoration(Drawable div) {
       this.div = div;
    }

    @Override
    public void onDrawOver(Canvas canvas, RecyclerView parent, RecyclerView.State state) {
        final int left = parent.getPaddingLeft();
        final int right = parent.getWidth() - parent.getPaddingRight();

        final int childCount = parent.getChildCount();
        for (int i = 0; i < childCount; i++) {
            final View child = parent.getChildAt(i);
            final RecyclerView.LayoutParams params = (RecyclerView.LayoutParams) child.getLayoutParams();
            final int top = child.getBottom() + params.bottomMargin;
            final int bottom = top + div.getIntrinsicHeight();
            div.setBounds(left, top, right, bottom);
            div.draw(canvas);
        }
    }
}
In this class, we override onDrawOver and implements our UI customizazion.
To set this decorator add following snippet to onCreate of MainActivity
recyclerView.addItemDecoration(
    new DividerItemDecoration(ContextCompat.getDrawable(getApplicationContext(),
        R.drawable.item_decorator)));
Where item_decorator is defined under res/drawable directroy in this way
<shape xmlns:android="http://schemas.android.com/apk/res/android"
       android:shape="rectangle">
      <size android:height="1dp" />
      <solid android:color="#FFB1BEC4" />
</shape>
Also we can add some margin to first item like so
public class ItemOffsetDecoration extends RecyclerView.ItemDecoration {
    private int offset;

    public ItemOffsetDecoration(int offset) {
        this.offset = offset;
    }

    @Override
    public void getItemOffsets(Rect outRect, View view,
                               RecyclerView parent, RecyclerView.State state) {

        if (parent.getChildAdapterPosition(view) == 0) {
                outRect.right = offset;
                outRect.left = offset;
                outRect.top = offset;
                outRect.bottom = offset;
            }
        }
    }
}
And use with following statement
recyclerView.addItemDecoration(new ItemOffsetDecoration(20));
You can add horizontal divider to RecyclerView with LinearLayoutManager via following snippet
recyclerView.addItemDecoration(new DividerItemDecoration(activity, DividerItemDecoration.VERTICAL));
There are several ways to create infinite scroll in RecyclerView:
- Use UltimateRecyclerView as substitution for
RecyclerView. Tutotial here. - Use Paginate to extend
RecyclerViewfunctionality. Read about it below. - Use PlaceHolderView as substitution for
RecyclerView. Tutotial here. - Implement
setOnLoadMoreListener. Details here.
My list of dependencies are
dependencies {
    compile fileTree(dir: 'libs', include: ['*.jar'])
    testCompile 'junit:junit:4.12'
    compile 'com.android.support:appcompat-v7:23.4.0'
    compile 'com.android.support:recyclerview-v7:23.3.0'
    compile 'com.android.support:cardview-v7:23.3.0'
    compile 'com.github.castorflex.smoothprogressbar:library-circular:1.2.0'
    compile 'com.github.markomilos:paginate:0.5.1'
}
Main layout activity_main.xml is the same.
MainActivity have updated to new version
public class MainActivity extends AppCompatActivity implements Paginate.Callbacks {
    RecyclerView recyclerView;

    private boolean loading = false;
    private int currentPage = 0;
    protected int threshold = 4;
    protected int totalPages = 10;
    private Handler handler = new Handler();
    private Paginate paginate;
    protected boolean addLoadingRow = true;
    protected boolean customLoadingListItem = false;
    Random rnd = new Random();

    RecyclerAdapter moviesAdapter;
    ArrayList movies;

    @Override
    protected void onCreate(Bundle savedInstanceState) {
        super.onCreate(savedInstanceState);
        setContentView(R.layout.activity_main);

        recyclerView = (RecyclerView) findViewById(R.id.rcView);
        LinearLayoutManager lm = new LinearLayoutManager(this, LinearLayoutManager.VERTICAL, false);
        recyclerView.setLayoutManager(lm);


        recyclerView.addOnItemTouchListener(new RecyclerItemListener(getApplicationContext(), recyclerView,
            new RecyclerItemListener.RecyclerTouchListener() {
                public void onClickItem(View v, int position) {
                    Toast.makeText(getApplicationContext(), "On Click Item interface",
                            Toast.LENGTH_LONG).show();
                }

                public void onLongClickItem(View v, int position) {
                    Toast.makeText(getApplicationContext(), "On Long Click Item interface",
                            Toast.LENGTH_LONG).show();
                }
        }));

        setupPagination();
    }

    protected void setupPagination() {
        if (paginate != null) {
            paginate.unbind();
        }

        handler.removeCallbacks(fakeCallback);

        movies = new ArrayList<String>(Arrays.asList("The Shawshank Redemption", "The Godfather",
                "The Godfather: Part II", "The Dark Knight", "Schindler's List", "12 Angry Men",
                "Pulp Fiction"));

        moviesAdapter = new RecyclerAdapter(this, movies);
        recyclerView.setAdapter(moviesAdapter);
        recyclerView.setHasFixedSize(true);

        loading = false;
        currentPage = 0;

        paginate = Paginate.with(recyclerView, this)
            .setLoadingTriggerThreshold(threshold)
            .addLoadingListItem(addLoadingRow)
            .setLoadingListItemCreator(customLoadingListItem ? new CustomLoadingListItemCreator() : null)
            .build();
    }

    @Override
    public synchronized void onLoadMore() {
        loading = true;
        // fake asynchronous loading that will generate page of random data after some delay
        handler.postDelayed(fakeCallback, 1000);
    }

    @Override
    public synchronized boolean isLoading() {
        return loading; // return boolean weather data is already loading or not
    }

    @Override
    public boolean hasLoadedAllItems() {
        return currentPage == totalPages; // if all pages are loaded return true
    }

    private Runnable fakeCallback = new Runnable() {
        @Override
        public void run() {
            currentPage++;
            moviesAdapter.add("Movie " + String.valueOf(rnd.nextInt(100)));
            loading = false;
        }
    };

    private class CustomLoadingListItemCreator implements LoadingListItemCreator {
        @Override
        public RecyclerView.ViewHolder onCreateViewHolder(ViewGroup parent, int viewType) {
            LayoutInflater inflater = LayoutInflater.from(parent.getContext());
            View view = inflater.inflate(R.layout.custom_loading_list_item, parent, false);
            return new LoadingHolder(view);
        }

        @Override
        public void onBindViewHolder(RecyclerView.ViewHolder holder, int position) {
            LoadingHolder lh = (LoadingHolder) holder;
            lh.tvLoading.setText(String.format("Total items loaded: %d.\nLoading more...", moviesAdapter.getItemCount()));
        }
    }

    static class LoadingHolder extends RecyclerView.ViewHolder {
        TextView tvLoading;

        public LoadingHolder(View itemView) {
            super(itemView);
            tvLoading = (TextView) itemView.findViewById(R.id.tv_loading_text);
        }
    }
}
Note some key things:
- We implemented
Paginate.Callbacksinterface for MainActivity. Paginate.Callbacksinterface requires three methodsonLoadMore,isLoading,hasLoadedAllItems.- We realize
fakeCallbackmethod for generating new items. - Class
CustomLoadingListItemCreatoris responsible for loader view.
Layout for custom loader is
<?xml version="1.0" encoding="utf-8"?>
<LinearLayout xmlns:android="http://schemas.android.com/apk/res/android"
    xmlns:tools="http://schemas.android.com/tools"
    android:layout_width="match_parent"
    android:layout_height="wrap_content"
    android:orientation="vertical"
    android:padding="10dp">

    <fr.castorflex.android.circularprogressbar.CircularProgressBar
        xmlns:android="http://schemas.android.com/apk/res/android"
        xmlns:app="http://schemas.android.com/apk/res-auto"
        android:layout_width="50dp"
        android:layout_height="50dp"
        android:layout_gravity="center"
        android:indeterminate="true"
        app:cpb_color="#F00"
        app:cpb_max_sweep_angle="300"
        app:cpb_min_sweep_angle="10"
        app:cpb_rotation_speed="1.0"
        app:cpb_stroke_width="4dp"
        app:cpb_sweep_speed="1.0"/>

    <TextView
        android:id="@+id/tv_loading_text"
        android:layout_width="wrap_content"
        android:layout_height="wrap_content"
        android:layout_gravity="center_horizontal"
        tools:text="Loading..."/>
</LinearLayout>
Following is new RecyclerAdapter
public class RecyclerAdapter extends RecyclerView.Adapter<RecyclerViewHolder> {
    List<String> names;
    Context context;
    LayoutInflater inflater;

    @Override
    public RecyclerViewHolder onCreateViewHolder(ViewGroup parent, int viewType) {
        View v = inflater.inflate(R.layout.item_list, parent, false);

        RecyclerViewHolder viewHolder = new RecyclerViewHolder(v);
        return viewHolder;
    }

    public RecyclerAdapter(Context context, List<String> name) {
        this.context = context;
        this.names = name;
        inflater = LayoutInflater.from(context);
    }

    @Override
    public void onBindViewHolder(RecyclerViewHolder holder, int position) {
        holder.tv1.setText(names.get(position));
        holder.imageView.setTag(holder);
    }

    @Override
    public int getItemCount() {
        return names.size();
    }

    public void add(String name) {
        int previousDataSize = names.size();
        names.add(name);
        //notifyDataSetChanged();
        notifyItemInserted(names.size());
    }
}
Layout for RecyclerView items and RecyclerViewHolder are the same.
Result
Similar to displaying items as a list, displaying items as a grid is simple using RecyclerView. In this section we are going to display images and text as grid using RecyclerView.
Our main layout has only one RecyclerView widget in LinearLayout.
<?xml version="1.0" encoding="utf-8"?>
<LinearLayout xmlns:android="http://schemas.android.com/apk/res/android"
    android:orientation="vertical" android:layout_width="match_parent"
    android:layout_height="match_parent">

    <android.support.v7.widget.RecyclerView
        xmlns:android="http://schemas.android.com/apk/res/android"
        android:id="@+id/rvItems"
        android:layout_width="match_parent"
        android:layout_height="match_parent"
        android:layout_margin="1dp"
        />

</LinearLayout>
The next layout is for RecylerView grid item. It has a Textview child widget to display some text.
<?xml version="1.0" encoding="utf-8"?>
<LinearLayout
    xmlns:android="http://schemas.android.com/apk/res/android"
    android:orientation="vertical"
    android:layout_width="match_parent"
    android:layout_height="100dp"
    android:layout_margin="2dp">

    <TextView
        android:id="@+id/tvTitle"
        android:layout_width="match_parent"
        android:layout_height="match_parent"
        android:gravity="center"/>

</LinearLayout>
Following is MainActivity with RecyclerView.Adapter and RecyclerViewHolder.
public class MainActivity extends AppCompatActivity {
    public class GridAdapter extends RecyclerView.Adapter<GridAdapter.RecyclerViewHolder>{
        Context context;
        LayoutInflater inflater;
        String[] items;
        Random rnd = new Random();

        public class RecyclerViewHolder extends RecyclerView.ViewHolder {
            TextView tvTitle;

            public RecyclerViewHolder(View view) {
                super(view);
                tvTitle = (TextView) view.findViewById(R.id.tvTitle);
            }
        }

        public GridAdapter (Context context, String[] items) {
            this.context = context;
            this.items = items;
            inflater = LayoutInflater.from(context);
        }

        @Override
        public GridAdapter.RecyclerViewHolder onCreateViewHolder(ViewGroup parent, int viewType) {
            View v = inflater.inflate(R.layout.grid_item, parent, false);
            GridAdapter.RecyclerViewHolder viewHolder = new GridAdapter.RecyclerViewHolder(v);
            return viewHolder;
        }

        @Override
        public void onBindViewHolder(GridAdapter.RecyclerViewHolder holder, final int position) {
            final String title = items[position];

            int color = getRandomHSVColor();
            holder.tvTitle.setBackgroundColor(getLighterColor(color));
            holder.tvTitle.setTextColor(getReverseColor(color));

            holder.tvTitle.setText(title);
            holder.itemView.setOnClickListener(new View.OnClickListener() {
                @Override
                public void onClick(View view) {
                    Toast.makeText(context, title, Toast.LENGTH_SHORT).show();
                }
            });
        }

        @Override
        public int getItemCount() {
            return items.length;
        }

        protected int getRandomHSVColor(){
            // Generate a random hue value between 0 to 360
            int hue = rnd.nextInt(361);
            // We make the color depth full
            float saturation = 1.0f;
            // We make a full bright color
            float value = 1.0f;
            // We avoid color transparency
            int alpha = 255;
            // Finally, generate the color
            int color = Color.HSVToColor(alpha, new float[]{hue, saturation, value});
            // Return the color
            return color;
        }

        protected int getReverseColor(int color){
            float[] hsv = new float[3];
            Color.RGBToHSV(
                    Color.red(color), // Red value
                    Color.green(color), // Green value
                    Color.blue(color), // Blue value
                    hsv
            );
            hsv[0] = (hsv[0] + 180) % 360;
            return Color.HSVToColor(hsv);
        }

        protected int getLighterColor(int color){
            float[] hsv = new float[3];
            Color.colorToHSV(color,hsv);
            hsv[2] = 0.2f + 0.8f * hsv[2];
            return Color.HSVToColor(hsv);
        }
    }

    int NUM_COLUMNS = 3;
    RecyclerView rvItems;
    String[] items = {"one", "two", "three", "four", "five", "six", "seven", "eight", "nine", "ten", "eleven"};

    @Override
    protected void onCreate(Bundle savedInstanceState) {
        super.onCreate(savedInstanceState);
        setContentView(R.layout.activity_main);

        GridAdapter adapter = new GridAdapter(this, items);

        rvItems = (RecyclerView) findViewById(R.id.rvItems);
        rvItems.setLayoutManager(new GridLayoutManager(this, NUM_COLUMNS));
        rvItems.setAdapter(adapter);
        rvItems.setHasFixedSize(true);
    }
}
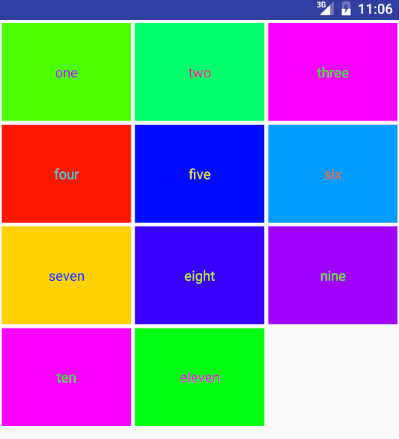
Result
You can use following snippet to set spacing between column
public class MainActivity extends AppCompatActivity {
    ...

    public class GridSpacingItemDecoration extends RecyclerView.ItemDecoration {
        private int spacing;
        private boolean includeEdge;

        public GridSpacingItemDecoration(int spacing, boolean includeEdge) {
            this.spacing = spacing;
            this.includeEdge = includeEdge;
        }

        @Override
        public void getItemOffsets(Rect outRect, View view, RecyclerView parent, RecyclerView.State state) {
            if (parent.getLayoutManager() instanceof GridLayoutManager) {
                GridLayoutManager layoutManager = (GridLayoutManager) parent.getLayoutManager();
                int spanCount = layoutManager.getSpanCount();
                int position = parent.getChildAdapterPosition(view);
                int column = position % spanCount;

                if (includeEdge) {
                    outRect.left = spacing - column * spacing / spanCount;
                    outRect.right = (column + 1) * spacing / spanCount;

                    if (position < spanCount) {
                        outRect.top = spacing;
                    }
                    outRect.bottom = spacing;
                } else {
                    outRect.left = column * spacing / spanCount;
                    outRect.right = spacing - (column + 1) * spacing / spanCount;
                    if (position >= spanCount) {
                        outRect.top = spacing;
                    }
                }
            }
        }
    }

    @Override
    protected void onCreate(Bundle savedInstanceState) {
        super.onCreate(savedInstanceState);
        setContentView(R.layout.activity_main);

        GridAdapter adapter = new GridAdapter(this, items);

        rvItems = (RecyclerView) findViewById(R.id.rvItems);
        rvItems.setLayoutManager(new GridLayoutManager(this, NUM_COLUMNS));
        rvItems.setAdapter(adapter);
        rvItems.setHasFixedSize(true);

        int spacingInPixels = getResources().getDimensionPixelSize(R.dimen.offset);
        GridSpacingItemDecoration itemDecoration = new GridSpacingItemDecoration(spacingInPixels, true);
        rvItems.addItemDecoration(itemDecoration);
    }
}
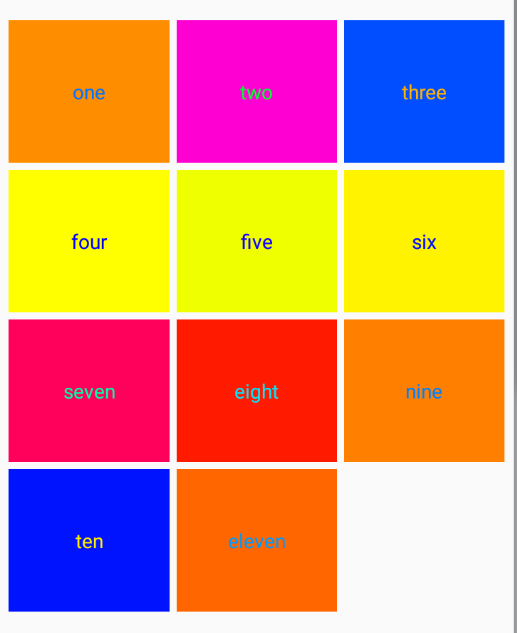
Result
How to order items in RecyclerView via SortedList
SortedList is a sorted list implementation that can keep items in order and also notify for changes in the list such that it can be bound to a RecyclerView.Adapter.
It keeps items ordered using the compare(Object, Object) method and uses binary search to retrieve items. If the sorting criteria of your items may change, make sure you call appropriate methods while editing them to avoid data inconsistencies.
You can control the order of items and change notifications via the SortedList.Callback parameter. Callbacks methods can be divided into
boolean areContentsTheSame (T2 oldItem, T2 newItem)boolean areItemsTheSame (T2 item1, T2 item2)int compare (T2 o1, T2 o2)
First two methods: areContentsTheSame, areItemsTheSame are basically hashCode and equals implementation. Those are used to determine if object was added or updated and are called after compare method returns "0" in comparison step.
Let's create a list of people and sort by distance field.
public class MainActivity extends AppCompatActivity {
    private RecyclerView rvItems;
    private LinearLayoutManager llManager;
    private SortedListAdapter adapter;

    private class Person {
        private int id;
        private float distance;

        public Person(int id, float distance) {
            this.id = id;
            this.distance = distance;
        }

        public int getId() {
            return id;
        }

        public float getDistance() {
            return distance;
        }

        @Override
        public String toString() {
            return "Person: " + getId();
        }
    }

    private class TodoViewHolder extends RecyclerView.ViewHolder {
        TextView tvTitle;
        Person person;

        public TodoViewHolder(View v) {
            super(v);
            tvTitle = (TextView) v;
        }

        public void bindTo(Person item) {
            person = item;
            tvTitle.setText("id: " + item.getId() + ", distance: " + item.getDistance());
        }
    }

    private class SortedListAdapter extends RecyclerView.Adapter<TodoViewHolder> {
        SortedList<Person> items;
        final LayoutInflater inflater;

        public SortedListAdapter(LayoutInflater layoutInflater, Person... persons) {
            inflater = layoutInflater;

            items = new SortedList<>(Person.class, new SortedListAdapterCallback<Person>(this) {
                @Override
                public int compare(Person p0, Person p1) {
                    return Float.compare(p0.getDistance(), p1.getDistance());
                }

                @Override
                public boolean areContentsTheSame(Person oldItem, Person newItem) {
                    return oldItem.getDistance() == newItem.getDistance();
                }

                @Override
                public boolean areItemsTheSame(Person item1, Person item2) {
                    return item1.getId() == item2.getId();
                }
            });

            for (Person item : persons) {
                items.add(item);
            }
        }

        public void addItem(Person item) {
            items.add(item);
        }

        public void delItem(Person item) {
            items.remove(item);
        }

        public void updateItem(Person item) {
            int total = items.size();
            int pos = -1;

            for (int i = 0; i < total; ++i) {
                Person tmp = items.get(i);
                if (tmp.getId() == item.getId()) {
                    pos = i;
                    break;
                }
            }

            if (pos >= 0) {
                items.updateItemAt(pos, item);
            }
        }

        @Override
        public TodoViewHolder onCreateViewHolder(final ViewGroup parent, int viewType) {
            return new TodoViewHolder(inflater.inflate(R.layout.sorted_item, parent, false));
        }

        @Override
        public void onBindViewHolder(TodoViewHolder holder, int position) {
            holder.bindTo(items.get(position));
        }

        @Override
        public int getItemCount() {
            return items.size();
        }

    }

    @Override
    protected void onCreate(Bundle savedInstanceState) {
        super.onCreate(savedInstanceState);
        setContentView(R.layout.activity_main);

        rvItems = (RecyclerView) findViewById(R.id.rvItems);
        rvItems.setHasFixedSize(true);
        llManager = new LinearLayoutManager(this);
        rvItems.setLayoutManager(llManager);

        adapter = new SortedListAdapter(getLayoutInflater(),
                new Person(1, 34.5f),
                new Person(2, 12.5f),
                new Person(4, 0.5f),
                new Person(5, 0.5f),
                new Person(3, 99.5f)
        );

        rvItems.setAdapter(adapter);
        rvItems.setHasFixedSize(true);

        new Handler().postDelayed(new Runnable() {
            @Override
            public void run() {
                adapter.updateItem(new Person(4, 15.5f));
                Toast.makeText(MainActivity.this, "Updated", Toast.LENGTH_SHORT).show();
            }
        }, 1000);
    }
}
Here is activity_main.xml file.
<?xml version="1.0" encoding="utf-8"?>
<LinearLayout xmlns:android="http://schemas.android.com/apk/res/android"
    android:layout_width="match_parent"
    android:layout_height="match_parent"
    android:orientation="vertical">

    <android.support.v7.widget.RecyclerView
        android:layout_width="match_parent"
        android:layout_height="match_parent"
        android:id="@+id/rvItems"/>

</LinearLayout>
Here is sorted_item.xml file.
<?xml version="1.0" encoding="utf-8"?>
<TextView xmlns:android="http://schemas.android.com/apk/res/android"
    android:layout_width="match_parent"
    android:layout_height="wrap_content"/>
Building a RecyclerView with Kotlin
Let's learn building a RecyclerView using Kotlin.
In your build.gradle of your project add the following:
buildscript {
    ext.kotlin_version = '1.1.51'
    repositories {
        google()
        jcenter()
    }
    dependencies {
        classpath 'com.android.tools.build:gradle:3.0.0'
        classpath "org.jetbrains.kotlin:kotlin-gradle-plugin:$kotlin_version"
        classpath "org.jetbrains.kotlin:kotlin-android-extensions:$kotlin_version"
    }
}
Kotlin Android Extensions is a compiler plugin that offers a convenient way of accessing views defined in XML via a property-like syntax.
Now in your build.gradle of your app add the following:
apply plugin: 'kotlin-android-extensions'

...

dependencies {
    ...
    implementation 'com.android.support:recyclerview-v7:27.0.0'
    implementation 'com.android.support:design:26.1.0'
    implementation 'com.android.support:cardview-v7:26.1.0'
}
Add RecyclerView to your activity_main.xml.
<?xml version="1.0" encoding="utf-8"?>
<android.support.constraint.ConstraintLayout
    xmlns:android="http://schemas.android.com/apk/res/android"
    android:layout_width="match_parent"
    android:layout_height="match_parent">

    <android.support.v7.widget.RecyclerView
        android:id="@+id/rvItems"
        android:layout_width="match_parent"
        android:layout_height="match_parent"/>

</android.support.constraint.ConstraintLayout>
Next step is to create our RecyclerViewAdapter.kt*. It is pretty much same as we usually do in Java.
class ItemAdapter(val items: ArrayList<Item>, val onClick: (Item) -> Unit) : RecyclerView.Adapter<ItemAdapter.ViewHolder>() {

    override fun onCreateViewHolder(parent: ViewGroup, viewType: Int): ItemAdapter.ViewHolder {
        val v = LayoutInflater.from(parent.context).inflate(R.layout.rv_item, parent, false)
        return ViewHolder(v, onClick)
    }

    override fun onBindViewHolder(holder: ItemAdapter.ViewHolder, position: Int) {
        holder.bindItems(items[position])
    }

    override fun getItemCount(): Int {
        return items.size
    }

    class ViewHolder(itemView: View, val onClick: (Item) -> Unit) : RecyclerView.ViewHolder(itemView) {
        fun bindItems(item: Item) {
            with(itemView) {
                itemView.tvName.text = item.name
                itemView.setOnClickListener{onClick(item)}
            }
        }
    }
}
with is a useful function included in the standard Kotlin library. It basically receives an object and an extension function as parameters, and makes the object execute the function. This means that all the code we define inside the brackets acts as an extension function of the object we specify in the first parameter, and we can use all its public functions and properties, as well as this. Really helpful to simplify code when we do several operations over the same object.
Following is the layout for item.
<?xml version="1.0" encoding="utf-8"?>
<android.support.v7.widget.CardView xmlns:android="http://schemas.android.com/apk/res/android"
    xmlns:app="http://schemas.android.com/apk/res-auto"
    android:id="@+id/cardView"
    android:layout_width="match_parent"
    android:layout_height="wrap_content"
    app:contentPadding="10dp">

    <TextView
        android:id="@+id/tvName"
        android:layout_width="match_parent"
        android:layout_height="wrap_content"
        android:textSize="12sp"/>

</android.support.v7.widget.CardView>
Now we will add the data class or you can say POJO class in Kotlin. A data class is a special class in Kotlin that provides you with default behaviors for all your Object methods like toString(), hashCode(), equals() and copy().
data class Item(var name: String)
Now everything is ready. Our adapter, model class, item layout and the main layout is ready. Now we have to attach the adapter to your RecyclerView.
class MainActivity : AppCompatActivity() {

    override fun onCreate(savedInstanceState: Bundle?) {
        super.onCreate(savedInstanceState)
        setContentView(R.layout.activity_main)

        rvItems.layoutManager = LinearLayoutManager(this, LinearLayout.VERTICAL, false)
        rvItems.addItemDecoration(LinearLayoutSpaceItemDecoration(16))

        val items = ArrayList<Item>()
        items.add(Item("Item 1"))
        items.add(Item("Item 2"))
        items.add(Item("Item 3"))
        items.add(Item("Item 4"))

        rvItems.adapter = ItemAdapter(items)
    }
}
Let's define LinearLayoutSpaceItemDecoration for space between items.
class LinearLayoutSpaceItemDecoration(var spacing: Int) : RecyclerView.ItemDecoration() {
    override fun getItemOffsets(outRect: Rect?, view: View?, parent: RecyclerView?, state: RecyclerView.State?) {
        if (outRect != null && parent != null) {
            var position = parent.getChildAdapterPosition(view)
            outRect.left = spacing
            outRect.right = spacing
            outRect.bottom = spacing
            if (position < 1) outRect.top = spacing
        }
    }
}
Scroll
recyclerView.scrollToPosition(position);
Smooth scroll
recyclerView.smoothScrollToPosition(position);
Add listener on scrolling
recyclerView.addOnScrollListener(new RecyclerView.OnScrollListener() {
    @Override
    public void onScrollStateChanged(RecyclerView recyclerView, int newState) {
        super.onScrollStateChanged(recyclerView, newState);
    }

    @Override
    public void onScrolled(RecyclerView recyclerView, int dx, int dy) {
        super.onScrolled(recyclerView, dx, dy);
        if (dy > 0) {
            // Scrolling up
        } else {
            // Scrolling down
        }
    }
});
Adding tools attributes for more pleasant UI developing
Android Studio supports a variety of XML attributes in the tools namespace that enable design-time features (such as which layout to show in a fragment) or compile-time behaviors (such as which shrinking mode to apply to your XML resources). When you build your app, the build tools remove these attributes so there is no effect on your APK size or runtime behavior.
Main layout with tools:menu, tools:listitem and tools:layoutManager.
<FrameLayout
    xmlns:android="http://schemas.android.com/apk/res/android"
    xmlns:tools="http://schemas.android.com/tools"
    android:layout_width="match_parent"
    android:layout_height="match_parent"
    tools:menu="menu_test">

    <RecyclerView
        android:id="@+id/recycler_view"
        android:layout_width="match_parent"
        android:layout_height="match_parent"
        tools:listitem="@layout/item_test"
        tools:layoutManager="GridLayoutManager"
        tools:spanCount="2"/>

</FrameLayout>
Item layout with tools:text.
<android.support.v7.widget.CardView
    android:layout_width="match_parent"
    android:layout_height="wrap_content">

    <TextView
        android:id="@+id/text_description"
        android:layout_width="wrap_content"
        android:layout_height="wrap_content"
        tools:text="@tools:sample/lorem/random"
        tools:lines="2"/>
</android.support.v7.widget.CardView>
As you can see, tools: gives you great power to prototype and experiment with your layout without writing a single line of Java or Kotlin code or adding unnecessary states to your view’s XML.
In this section you'll learn how to how to populate an empty RecyclerView list using custom animations.
There are some ways of doing this, e.g.:
- Implementing a custom
ItemAnimator - Add animation handling to
onBindViewHolder()in the Adapter
We’ll be using a third option, LayoutAnimation. It’s easy and only requires a small amount of code. It’s worth noting that though this tutorial is focused around RecyclerViews, LayoutAnimations can be applied to any subclass of ViewGroup.
So let’s start of by creating the item animation, in this example we’ll go for the Fall Down animation shown below.
Start of by creating the file item_animation_fall_down.xml in res/anim/ and add the following:
<set xmlns:android="http://schemas.android.com/apk/res/android"
     android:duration="@integer/anim_duration_medium">

    <translate
        android:fromYDelta="-20%"
        android:toYDelta="0"
        android:interpolator="@android:anim/decelerate_interpolator"
        />

    <alpha
        android:fromAlpha="0"
        android:toAlpha="1"
        android:interpolator="@android:anim/decelerate_interpolator"
        />

    <scale
        android:fromXScale="105%"
        android:fromYScale="105%"
        android:toXScale="100%"
        android:toYScale="100%"
        android:pivotX="50%"
        android:pivotY="50%"
        android:interpolator="@android:anim/decelerate_interpolator"
        />
</set>
The steps above will run together during the animation. Here’s a short explanation of each step:
- Translate Y -20% to 0%. Before the animation starts, move up the view by 20% of it’s own height, and let it fall down to its final position.
- Alpha 0 to 1. The view will start completely invisible and slowly appear until fully visible.
- Scale X/Y 105% to 100%. The scale is set to 105% to let it shrink down to it’s final size. This will make it appear as though it’s falling down, onto the background.
With the item animation done it’s time to define the layout animation which will apply the item animation to each child in the layout. Create a new file called layout_animation_fall_down.xml in res/anim/ and add the following:
<?xml version="1.0" encoding="utf-8"?>
<layoutAnimation
    xmlns:android="http://schemas.android.com/apk/res/android"
    android:animation="@anim/item_animation_fall_down"
    android:delay="15%"
    android:animationOrder="normal"
    />
android:animation="@anim/item_animation_fall_down". Defines which animation to apply to each item in the layout.android:delay="15%". Adds a start delay for each item that’s based on the duration of the item animation. 0% will cause all items in the layout to animate simultaneously, and 100% will let each item finish it’s animation before the next one is started. In this case, 15% of item A’s animation will pass before item B starts its animation.android:animationOrder="normal". There are three types to choose from: normal, reverse and random. This allows to control in which order the content will be animated. Normal follows the natural order of the layout (vertical: top to bottom, horizontal: left to right), Reverse is the opposite of Normal and Random…well Random is random order.
A LayoutAnimation can be applied both programmatically and in XML.
int resId = R.anim.layout_animation_fall_down;
LayoutAnimationController animation = AnimationUtils.loadLayoutAnimation(ctx, resId);
recyclerview.setLayoutAnimation(animation);
<android.support.v7.widget.RecyclerView
    android:layout_width="match_parent"
    android:layout_height="match_parent"
    android:layoutAnimation="@anim/layout_animation_fall_down"
    />
If you are changing data set or just want to re-run the animation you can do it like this:
private void runLayoutAnimation(final RecyclerView recyclerView) {
    final Context context = recyclerView.getContext();
    final LayoutAnimationController controller =
            AnimationUtils.loadLayoutAnimation(context, R.anim.layout_animation_fall_down);

    recyclerView.setLayoutAnimation(controller);
    recyclerView.getAdapter().notifyDataSetChanged();
    recyclerView.scheduleLayoutAnimation();
}
Expandable RecyclerView Android
First of all, we need to create a model class.
public class Movie {
    public int id;
    private String name;
    private int year;
    private List<String> actors;

    public Movie(String name, int year, List<String> actors) {
        this.name = name;
        this.year = year;
        this.actors = actors;
    }

    public String getName() {
        return name;
    }

    public void setName(String name) {
        this.name = name;
    }

    public int getYear() {
        return year;
    }

    public void setYear(int year) {
        this.year = year;
    }

    public List<String> getActors() {
        return actors;
    }

    public void setActors(List<String> actors) {
        this.actors = actors;
    }

    @Override
    public String toString() {
        return "Movie{" +
                "name='" + name + '\'' +
                ", year=" + year +
                '}';
    }
}
Following is a adapter.
public class MovieAdapter extends RecyclerView.Adapter<MovieAdapter.RecyclerViewHolder>{
    Context context;
    LayoutInflater inflater;
    List<Movie> items;
    private SparseIntArray expanded = new SparseIntArray();

    public class RecyclerViewHolder extends RecyclerView.ViewHolder {
        TextView tvTitle, tvActors;

        public RecyclerViewHolder(View itemView) {
            super(itemView);
            tvTitle = (TextView) itemView.findViewById(R.id.tvTitle);
            tvActors = (TextView) itemView.findViewById(R.id.tvActors);
        }
    }

    public MovieAdapter(Context context) {
        this.context = context;
        this.inflater = LayoutInflater.from(context);
        this.items = new ArrayList<>();
    }

    @Override
    public RecyclerViewHolder onCreateViewHolder(ViewGroup parent, int viewType) {
        View v = inflater.inflate(R.layout.recycle_item, parent, false);

        RecyclerViewHolder viewHolder = new RecyclerViewHolder(v);
        return viewHolder;
    }

    @Override
    public void onBindViewHolder(final RecyclerViewHolder holder, final int position) {
        final Movie item = items.get(position);
        holder.tvTitle.setText(item.getName());
        holder.tvTitle.setTag(holder);

        if (expanded.get(position) == 0) {
            holder.tvActors.setVisibility(View.GONE);
        } else {
            Animation slideDown = AnimationUtils.loadAnimation(context, R.anim.slide_down);
            holder.tvActors.setVisibility(View.VISIBLE);
            holder.tvActors.setText(TextUtils.join(",", item.getActors()));
            holder.tvActors.startAnimation(slideDown);
        }

        holder.itemView.setOnClickListener(new View.OnClickListener() {
            @Override
            public void onClick(View view) {
                if (expanded.get(position) == 0) {
                    expanded.put(position, 1);
                } else {
                    expanded.put(position, 0);
                }
                notifyItemChanged(position);
            }
        });
    }

    @Override
    public int getItemCount() {
        return items.size();
    }

    public void addAll(List<Movie> items) {
        this.items.clear();
        this.items = items;
        notifyDataSetChanged();
    }
}
Layout for RecyclerView item.
<?xml version="1.0" encoding="utf-8"?>
<RelativeLayout
    xmlns:android="http://schemas.android.com/apk/res/android"
    android:layout_width="match_parent"
    android:layout_height="wrap_content"
    android:padding="5dp">

    <TextView
        android:id="@+id/tvTitle"
        android:layout_alignParentTop="true"
        android:layout_alignParentLeft="true"
        android:layout_width="match_parent"
        android:layout_height="wrap_content"
        android:text="Title"
        android:textColor="#000000"
        android:textAppearance="@style/Base.TextAppearance.AppCompat.Medium" />

    <TextView
        android:id="@+id/tvActors"
        android:layout_width="match_parent"
        android:layout_height="wrap_content"
        android:textColor="@android:color/darker_gray"
        android:textAppearance="@style/Base.TextAppearance.AppCompat.Small"
        android:layout_below="@id/tvTitle"
        android:layout_alignParentLeft="true"
        android:layout_marginTop="5dp"
        android:visibility="gone" />

</RelativeLayout>
Animation for RecyclerView item (/res/anim/slide_down.xml file).
<?xml version="1.0" encoding="utf-8"?>
<set xmlns:android="http://schemas.android.com/apk/res/android">
    <scale
        android:duration="500"
        android:fromXScale="1.0"
        android:fromYScale="0.0"
        android:toXScale="1.0"
        android:toYScale="1.0" />
</set>
MainActivity
public class MainActivity extends AppCompatActivity {
    private AppCompatActivity activity = MainActivity.this;
    private String TAG = MainActivity.class.getSimpleName();
    String channelId = "1";
    String channelName = "Main channel";
    RecyclerView recyclerView;

    String KEY_REPLY = "key_reply";
    public static final int NOTIFICATION_ID = 1;

    @Override
    protected void onCreate(Bundle savedInstanceState) {
        super.onCreate(savedInstanceState);
        setContentView(R.layout.activity_main);

        recyclerView = (RecyclerView) findViewById(R.id.rcView);

        MovieAdapter adapter = new MovieAdapter(this);
        recyclerView.setAdapter(adapter);

        List<Movie> movies = new ArrayList<>();
        movies.add(new Movie("Movie 1", 2001, Arrays.asList("Actor 1", "Actor 2")));
        movies.add(new Movie("Movie 2", 2002, Arrays.asList("Actor 3", "Actor 4")));
        movies.add(new Movie("Movie 3", 2003, Arrays.asList("Actor 5")));

        adapter.addAll(movies);

        LinearLayoutManager lm = new LinearLayoutManager(this, LinearLayoutManager.VERTICAL, false);
        recyclerView.setLayoutManager(lm);
        recyclerView.getLayoutManager().setMeasurementCacheEnabled(false);
    }
}
Layout for MainActivity
<?xml version="1.0" encoding="utf-8"?>
<RelativeLayout
    xmlns:android="http://schemas.android.com/apk/res/android"
    android:layout_width="match_parent"
    android:layout_height="match_parent">

    <android.support.v7.widget.RecyclerView
        android:id="@+id/rcView"
        android:layout_width="match_parent"
        android:layout_height="wrap_content"/>

</RelativeLayout>
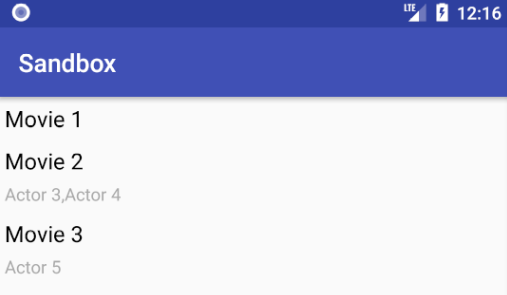
Result
Also you can use ExpandableListView.
In this recipe, we will learn how to leverage great things in Kotlin to make RecyclerView much more efficient. We will also be using DiffUtils. It is available from 24.02. According to the documentation:
DiffUtil is a utility class that can calculate the difference between two lists and output a list of update operations that converts the first list into the second one.
The definition is self-explainatory. The notifyDatasetChanged is a very expensive operation of the adapter. The DiffUtils only updates the parts that were changed, unlike notifyDatasetChanged, which updates the whole list.
First, we need to define a list of movies. So, we will first create a data class that takes in name and year of movie:
data class Movie (var name:String, val year:Int)
Next, we will create a list of movies:
class MainActivity : AppCompatActivity() {
    override fun onCreate(savedInstanceState: Bundle?) {
        super.onCreate(savedInstanceState)
        setContentView(R.layout.activity_main)

        val movies = listOf<Movie>(
                Movie("The Shawshank Redemption", 1994),
                Movie("The Godfather", 1972),
                Movie("The Dark Knight", 2008),
                Movie("The Godfather: Part II", 1974)
        )

        var adapter = MovieAdapter()
        rvMovies.layoutManager = LinearLayoutManager(this)
        rvMovies.adapter = adapter
        adapter.items = movies
    }
}
Now, we will create an adapter. We will name it MovieAdapter:
class MovieAdapter: RecyclerView.Adapter<MovieAdapter.MovieViewHolder>() {
    var items:List<Movie> by Delegates.observable(emptyList()) {
        property, oldValue, newValue ->
        notifyChanges(oldValue, newValue)
    }

    override fun onCreateViewHolder(parent: ViewGroup, viewType: Int): MovieAdapter.MovieViewHolder {
        val v = LayoutInflater.from(parent.context).inflate(R.layout.movie_item, parent, false)
        return MovieViewHolder(v)
    }

    override fun getItemCount(): Int = items.size

    override fun onBindViewHolder(holder: MovieViewHolder, position: Int) {
        holder.name.text = items.get(holder.adapterPosition).name
        holder.year.text = items.get(holder.adapterPosition).year.toString()
    }

    override fun onBindViewHolder(holder: MovieViewHolder, position: Int, payloads: MutableList<Any>?) {
        if (payloads != null) {
            if (payloads.isEmpty())
                return onBindViewHolder(holder,position)
            else {
                val o = payloads.get(0) as Bundle
                for (key in o.keySet()) {
                    when(key) {
                        "name" -> holder.name.text = o.getString("name")
                        "year" -> holder.year.text = o.getInt("year").toString()
                    }
                }
            }
        }
    }

    inner class MovieViewHolder(var view: View) : RecyclerView.ViewHolder(view) {
        var name: TextView = view.findViewById(R.id.tvName)
        var year: TextView = view.findViewById(R.id.tvYear)
    }

    private fun notifyChanges(oldValue: List<Movie>, newValue: List<Movie>) {
        val diff = DiffUtil.calculateDiff(object : DiffUtil.Callback() {
            override fun getChangePayload(oldItemPosition: Int, newItemPosition: Int): Any? {
                val oldItem = oldValue.get(oldItemPosition)
                val newItem = newValue.get(newItemPosition)
                val bundle= Bundle()
                if(!oldItem.name.equals(newItem.name)){
                    bundle.putString("name", newItem.name)
                }
                if(oldItem.year != newItem.year){
                    bundle.putInt("year", newItem.year)
                }
                if(bundle.size() == 0) return null
                return bundle
            }

            override fun areItemsTheSame(oldItemPosition: Int, newItemPosition: Int): Boolean {
                return oldValue.get(oldItemPosition) == newValue.get(newItemPosition)
            }

            override fun areContentsTheSame(oldItemPosition: Int, newItemPosition: Int): Boolean {
                return oldValue.get(oldItemPosition).name.equals(newValue.get(newItemPosition).name)
                        && oldValue.get(oldItemPosition).year == newValue.get(newItemPosition).year
            }

            override fun getOldListSize() = oldValue.size

            override fun getNewListSize() = newValue.size

        })

        diff.dispatchUpdatesTo(this)
    }
}
The preceding code is quite standard for the general implementation of RecyclerView, except for the two things.
Another thing is that we have defined the list of Movie in the adapters. The items in the adapter is an observable property. This means the listener gets notified of changes to this property.
Now, whenever we try to assign a value to the items variable, the construct under the { .. } block is run, and we have old and new values to do an operation if we want. In this case, we will do it using the notifyChanges method.
Let's dive into the DiffUtils. The DiffUtils requires two arrays/lists, one of which should be the old list and the other should be the new list.
There are five main functions:
getNewListSize(): This returns the size of the new list.getOldListSize(): This method returns the size of the old list.areItemsTheSame(): This method is used to determine whether two objects represent the same item. If your items have unique ids, this method should check their id equality.areContentsTheSame(): This method is used to determine whether the two objects contain the same data. This method is called by DiffUtil only ifareItemsTheSamereturns true. In our implementation, we are returning true if both objects have the same name and image.getChangePayload(): WhenareItemsTheSame()returns true andareContentsTheSame()returns false, thenDiffUtilscalls this method to get the payload of changes.
Finally, after the diff calculation, the DiffUtils object dispatches the changes to the Adapter. To do that, we call the dispatchUpdatesTo method:
diff.dispatchUpdatesTo(this)
To update the changes from the data in the payload, you need to override onBindViewHolder(holder, position, payloads).The changes in the payload are dispatched using the notifyItemRangeChanged method of the adapter.
Following is activity_main.xml.
<?xml version="1.0" encoding="utf-8"?>
<RelativeLayout
    xmlns:android="http://schemas.android.com/apk/res/android"
    android:layout_width="match_parent"
    android:layout_height="match_parent">

    <android.support.v7.widget.RecyclerView
        android:id="@+id/rvMovies"
        android:layout_width="match_parent"
        android:layout_height="match_parent"
        android:clipToPadding="false" />

</RelativeLayout>
Following is movie_item.xml.
<?xml version="1.0" encoding="utf-8"?>
<LinearLayout
    xmlns:android="http://schemas.android.com/apk/res/android"
    android:layout_width="match_parent"
    android:layout_height="wrap_content"
    android:orientation="vertical">

    <TextView
        android:id="@+id/tvName"
        android:textAppearance="@style/Base.TextAppearance.AppCompat.Large"
        android:layout_width="match_parent"
        android:layout_height="wrap_content" />

    <TextView
        android:id="@+id/tvYear"
        android:textAppearance="@style/Base.TextAppearance.AppCompat.Small"
        android:layout_width="match_parent"
        android:layout_height="wrap_content" />
</LinearLayout>
DiffUtil uses the following methods of the RecyclerViewAdapter:
- notifyItemMoved()
- notifyItemRangeChanged()
- notifyItemRangeInserted()
- notifyItemRangeRemoved()
These are less costlier than notifyDataSetChanged since they work on individual operations.
Let’s look at our model class:
public class Movie implements Comparable, Cloneable {
    private int id;
    private String name;
    private int year;

    public Movie(int id, String name, int year) {
        this.name = name;
        this.year = year;
        this.id = id;
    }

    public String getName() {
        return name;
    }

    public void setName(String name) {
        this.name = name;
    }

    public int getYear() {
        return year;
    }

    public void setYear(int year) {
        this.year = year;
    }

    public int getId() {
        return id;
    }

    public void setId(int id) {
        this.id = id;
    }

    @Override
    public int compareTo(Object o) {
        Movie compare = (Movie) o;
        if (compare.getYear() == this.getYear() && compare.getName().equals(this.getName())) {
            return 0;
        }
        return 1;
    }

    @Override
    public Movie clone() {
        Movie clone;
        try {
            clone = (Movie) super.clone();
        } catch (CloneNotSupportedException e) {
            throw new RuntimeException(e);
        }

        return clone;
    }

    @Override
    public String toString() {
        return "Movie{" +
                "name='" + name + '\'' +
                ", year=" + year +
                '}';
    }
}
I’ve implemented the Comparable and Cloneable interfaces.
Following is code for MainActivity
public class MainActivity extends AppCompatActivity {
    RecyclerView rv;
    List<Movie> movies;
    MovieAdapter adapter;

    @Override
    protected void onCreate(Bundle savedInstanceState) {
        super.onCreate(savedInstanceState);
        setContentView(R.layout.activity_main);

        rv = findViewById(R.id.rv);

        movies = new ArrayList<>();
        movies.add(new Movie(0, "The Shawshank Redemption", 1994));
        movies.add(new Movie(1, "The Godfather", 1972));
        movies.add(new Movie(2,"The Dark Knight", 2008));
        movies.add(new Movie(3, "The Godfather: Part II", 1974));

        adapter = new MovieAdapter(this, movies);
        rv.setAdapter(adapter);
        rv.setHasFixedSize(true);
        LinearLayoutManager lm = new LinearLayoutManager(this, LinearLayoutManager.VERTICAL, false);
        rv.setLayoutManager(lm);
    }

    public void updateList(View v) {
        ArrayList<Movie> items = new ArrayList<>();

        for (Movie movie : movies) {
            items.add(movie.clone());
        }

        for (Movie movie : items) {
            if (movie.getYear() < 2000)
                movie.setName(String.format("%s (classic)", movie.getName()));
        }

        adapter.updateList(items);
    }
}
ArrayList are passed by reference. We need to create a deep copy of the ArrayList to prevent the original ArrayList from changing when we modify the new ArrayList. Otherwise, DiffUtil would get two ArrayLists that are just the same.
Following is layout for MainActivity
<?xml version="1.0" encoding="utf-8"?>
<LinearLayout xmlns:android="http://schemas.android.com/apk/res/android"
    android:layout_width="match_parent"
    android:layout_height="match_parent"
    android:orientation="vertical">

    <android.support.v7.widget.RecyclerView
        android:id="@+id/rv"
        android:layout_width="match_parent"
        android:layout_height="wrap_content"/>

    <Button
        android:id="@+id/btnUpdate"
        android:layout_width="wrap_content"
        android:layout_height="wrap_content"
        android:text="Update"
        android:onClick="updateList"/>

</LinearLayout>
Following is RecyclerView.Adapter
public class MovieAdapter extends RecyclerView.Adapter<MovieAdapter.RecyclerViewHolder> {
    Context context;
    LayoutInflater inflater;
    List<Movie> items;

    public class RecyclerViewHolder extends RecyclerView.ViewHolder {
        TextView tvMovie, tvYear;

        public RecyclerViewHolder(View itemView) {
            super(itemView);
            tvMovie = itemView.findViewById(R.id.tvMovie);
            tvYear = itemView.findViewById(R.id.tvYear);
        }
    }

    public MovieAdapter(Context context, List<Movie> items) {
        this.context = context;
        this.inflater = LayoutInflater.from(context);
        this.items = items;
    }

    @Override
    public RecyclerViewHolder onCreateViewHolder(ViewGroup parent, int viewType) {
        View v = inflater.inflate(R.layout.item_list, parent, false);

        RecyclerViewHolder viewHolder = new RecyclerViewHolder(v);
        return viewHolder;
    }

    @Override
    public void onBindViewHolder(RecyclerViewHolder holder, int position) {
        holder.tvMovie.setText("" + items.get(position).getName());
        holder.tvYear.setText("" + items.get(position).getYear());
    }

    @Override
    public int getItemCount() {
        return items.size();
    }

    public void updateList(List<Movie> newList) {
        DiffUtil.DiffResult diffResult = DiffUtil.calculateDiff(new MovieDiffCallback(newList, this.items));

        this.items.clear();
        this.items.addAll(newList);

        diffResult.dispatchUpdatesTo(this);
    }
}
Following is layout for RecyclerView.Adapter
<?xml version="1.0" encoding="utf-8"?>
<android.support.constraint.ConstraintLayout xmlns:android="http://schemas.android.com/apk/res/android"
    xmlns:app="http://schemas.android.com/apk/res-auto"
    android:layout_width="match_parent"
    android:layout_height="wrap_content"
    xmlns:tools="http://schemas.android.com/tools">

    <TextView
        android:id="@+id/tvMovie"
        android:layout_width="wrap_content"
        android:layout_height="wrap_content"
        android:layout_marginStart="8dp"
        android:layout_marginTop="8dp"
        android:textSize="20sp"
        app:layout_constraintStart_toStartOf="parent"
        app:layout_constraintTop_toTopOf="parent"
        tools:text="The Movie" />

    <TextView
        android:id="@+id/tvYear"
        android:layout_width="wrap_content"
        android:layout_height="wrap_content"
        android:layout_marginStart="8dp"
        android:layout_marginTop="8dp"
        android:textSize="15sp"
        app:layout_constraintStart_toStartOf="parent"
        app:layout_constraintTop_toBottomOf="@+id/tvMovie"
        tools:text="1992" />

</android.support.constraint.ConstraintLayout>
Following is code for DiffUtil.Callback
public class MovieDiffCallback extends DiffUtil.Callback {
    List<Movie> newItems;
    List<Movie> oldItems;
    private static final String TAG = "MovieDiffCallback";

    public MovieDiffCallback(List<Movie> newItems, List<Movie> oldItems) {
        this.newItems = newItems;
        this.oldItems = oldItems;
    }

    @Override
    public int getOldListSize() {
        return oldItems.size();
    }

    @Override
    public int getNewListSize() {
        return newItems.size();
    }

    @Override
    public boolean areItemsTheSame(int oldItemPosition, int newItemPosition) {
        return oldItems.get(oldItemPosition).getId() == newItems.get(newItemPosition).getId();
    }

    @Override
    public boolean areContentsTheSame(int oldItemPosition, int newItemPosition) {
        return oldItems.get(oldItemPosition).equals(newItems.get(newItemPosition));
    }

    @Nullable
    @Override
    public Object getChangePayload(int oldItemPosition, int newItemPosition) {
        return super.getChangePayload(oldItemPosition, newItemPosition);
    }
}
Useful links
Quote
Categories
- Android
- AngularJS
- Databases
- Development
- Django
- iOS
- Java
- JavaScript
- LaTex
- Linux
- Meteor JS
- Python
- Science
Archive ↓
- September 2024
- December 2023
- November 2023
- October 2023
- March 2022
- February 2022
- January 2022
- July 2021
- June 2021
- May 2021
- April 2021
- August 2020
- July 2020
- May 2020
- April 2020
- March 2020
- February 2020
- January 2020
- December 2019
- November 2019
- October 2019
- September 2019
- August 2019
- July 2019
- February 2019
- January 2019
- December 2018
- November 2018
- August 2018
- July 2018
- June 2018
- May 2018
- April 2018
- March 2018
- February 2018
- January 2018
- December 2017
- November 2017
- October 2017
- September 2017
- August 2017
- July 2017
- June 2017
- May 2017
- April 2017
- March 2017
- February 2017
- January 2017
- December 2016
- November 2016
- October 2016
- September 2016
- August 2016
- July 2016
- June 2016
- May 2016
- April 2016
- March 2016
- February 2016
- January 2016
- December 2015
- November 2015
- October 2015
- September 2015
- August 2015
- July 2015
- June 2015
- February 2015
- January 2015
- December 2014
- November 2014
- October 2014
- September 2014
- August 2014
- July 2014
- June 2014
- May 2014
- April 2014
- March 2014
- February 2014
- January 2014
- December 2013
- November 2013
- October 2013